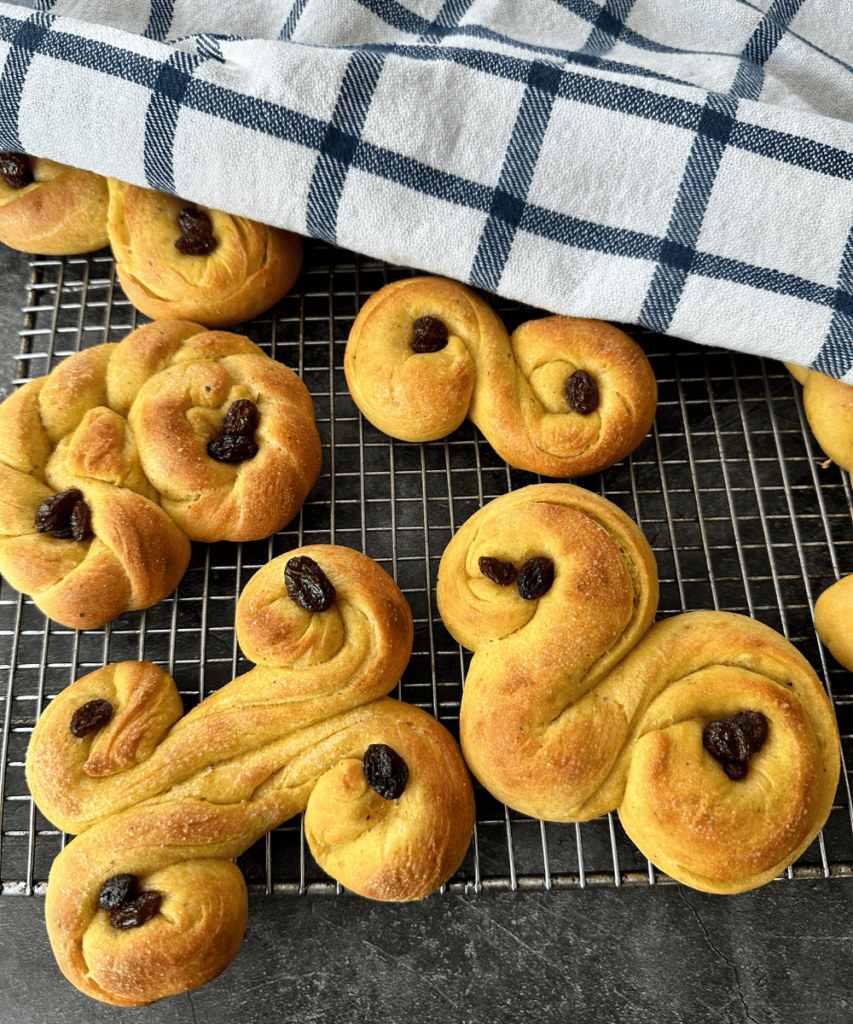
On December 13th you will smell the sweet scent of lussekatter, otherwise known as saffron buns, around the thousands of homes in Norway and Sweden, to signify the day of Saint Lucia, the protector of the blind.
Lussekatter signify that Christmas is just around the corner and are some of the most fun pastries to make. Children and grown ups both love these fluffy, gorgeously yellow yeasty buns that have a slight sweetness, yet a nice savory character from the saffron.
The name “lussekatt” is borrowed from Sweden, where celebrating the day of St. Lucia has a long history.
The tradition of baking saffron buns, or “lussekatter”, originally stems from 17th century Germany.
The Devil, in the shape of a cat, would spank naughty children, while a Christ-like figure would hand out buns to children who had been good. To keep the Devil away, and who was scared of the light, the buns would be colored with a bright, shiny yellow color in the form of saffron (sometimes turmeric would be used, which is a much cheaper alternative).
Another tradition selected the eldest daughter in the family to play “Saint Lucia” and her role was to serve her parents saffron bread shaped like lussekatter (cats) in bed.
She would be dressed in white, wearing a wreath made from lingonberry heather arranged with four candles, while singing the St. Lucia song: “Svart senker natten seg istall og stue. Solen har gått sin vei. Skyggene truer. Inn i vårtmørke hus. Stiger med tente lys Santa Lucia. Santa Lucia.“
Originally this is an Italian song. Because the Nordic countries historically have had a lot of men working at sea, they most likely brought this song and tradition back with them from Italy.
Today, children dressed in white with candle-decorated wreaths on their heads can be seen and heard singing this song around schools, kindergartens, and other public venues and parties around the country.
I previously wrote about St. Lucia day and shared a slightly different recipe for lussekatter here, where I write more about the tradition and history of St. Lucia Day.
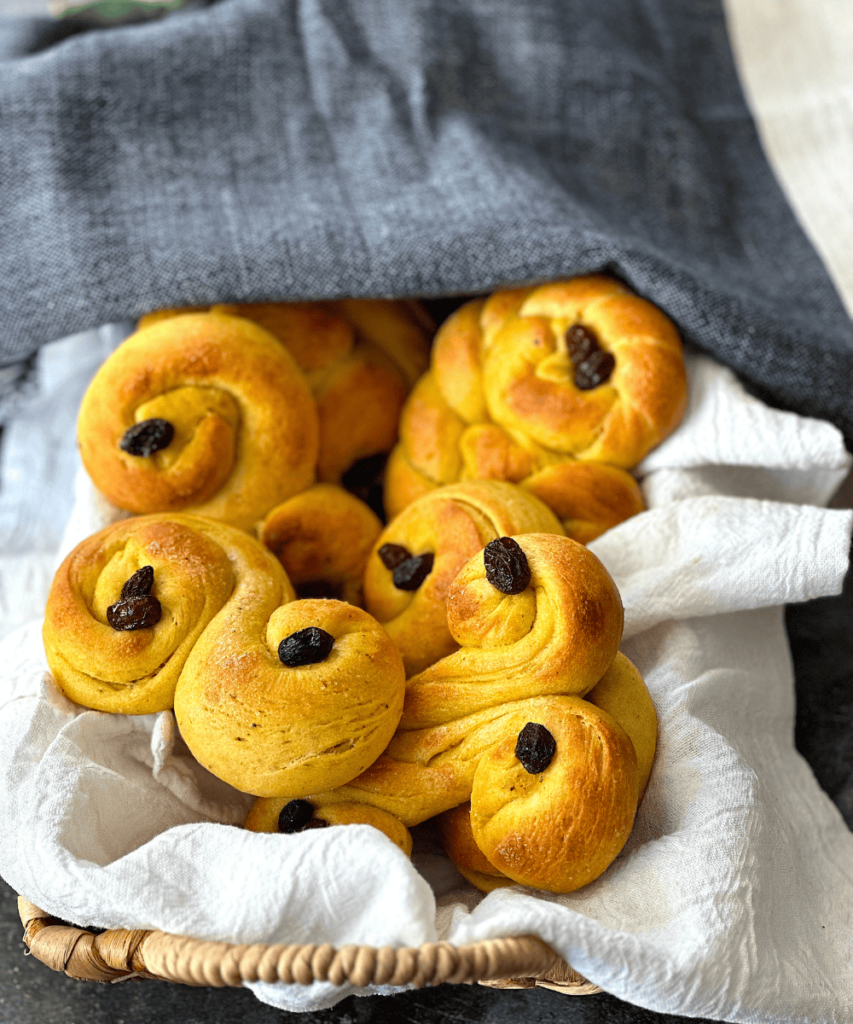
This year I tweaked my recipe slightly and was really happy with the outcome. This makes a beautiful, smooth dough with a gorgeous texture once baked—just like in the bakeries!
A few tips that will set you up for success when making lussekatter:
1. Don’t ever think about substituting turmeric for saffron, it’s not even close to the same flavor. Saffron is a must!
2. Be sure to “bloom” the saffron threads in a little warm milk for about 30 minutes, this will bring out the gorgeous yellow color that will translate to an equally gorgeous-looking dough. Otherwise, you can make a simple syrup made from 25 grams of sugar and 1/2 cup (125ml) and add in 1 gram of saffron and let it steep, preferably overnight (this is a trick Scandinavian bakers use to bring out that beautiful and vibrant yellow color in the dough).
3. Take time to let the dough rise, and it’s equally important to knead it long enough. This will really ensure that the yeast gets time to work properly
4. Make sure to soak your raisins before decorating your buns, otherwise, they will dry up and burn in the oven (not very tasty!)
Now you should be all set up to make your saffron buns…
Happy baking!
THE WORLD’S BEST LUSSEKATTER
Makes about 20-24 lussekatter
2 lbs (900 grams) all-purpose flour
2 cups (500 ml ) soy or other non-dairy milk
¾ cups (150 grams) sugar
1/2 teaspoon salt
1 gram saffron threads (about 10-15 threads)
2 ¼ teaspoon dry active yeast
1 stick + 2 tablespoons butter (150 gram ) butter, diced + extra for brushing
½ cup (70 grams) of raisins, soaked in warm water, for decorating
Non-dairy milk for brushing the dough
Sugar for sprinkling on top (optional)
Heat up about 1/2 cup (125ml) of the milk in a small pot, and add the saffron threads in. Let bloom for about 30 minutes to draw out the color. Alternatively, bring 1/2 cup of water with 25 grams of sugar to a boil, whisk to combine. Remove from heat and add in the saffron and let bloom for at least 1 hour, preferably over night.
After 30 minutes, add the saffron-colored milk and the remaining milk along with all the other ingredients except the butter and raisins into the bowl of a stand mixer. Fitted with a dough hook, knead the dough for about 10minutes until the dough gets firm and smooth and releases from the sides of the bowl.
Add in the diced butter gradually and knead for another 10 minutes – the butter should be well integrated into the dough. At first, it will look really wet and messy but be patient and it will firm right back up.
Cover the dough with a clean towel or plastic and let rise for about 1 1/2 hours.
Prepare three baking sheets lined with parchment paper or silpats.
Sprinkle some flour on a clean work surface, pour the dough out onto the table and divide it into 20 equal pieces. Alternatively roll out the dough to a rectangle about 12 x 24 inches (60 x 30 cm) and using a pizza or pastry cutter, divide the dough into strips, 1.5 inches x 12 inches long.
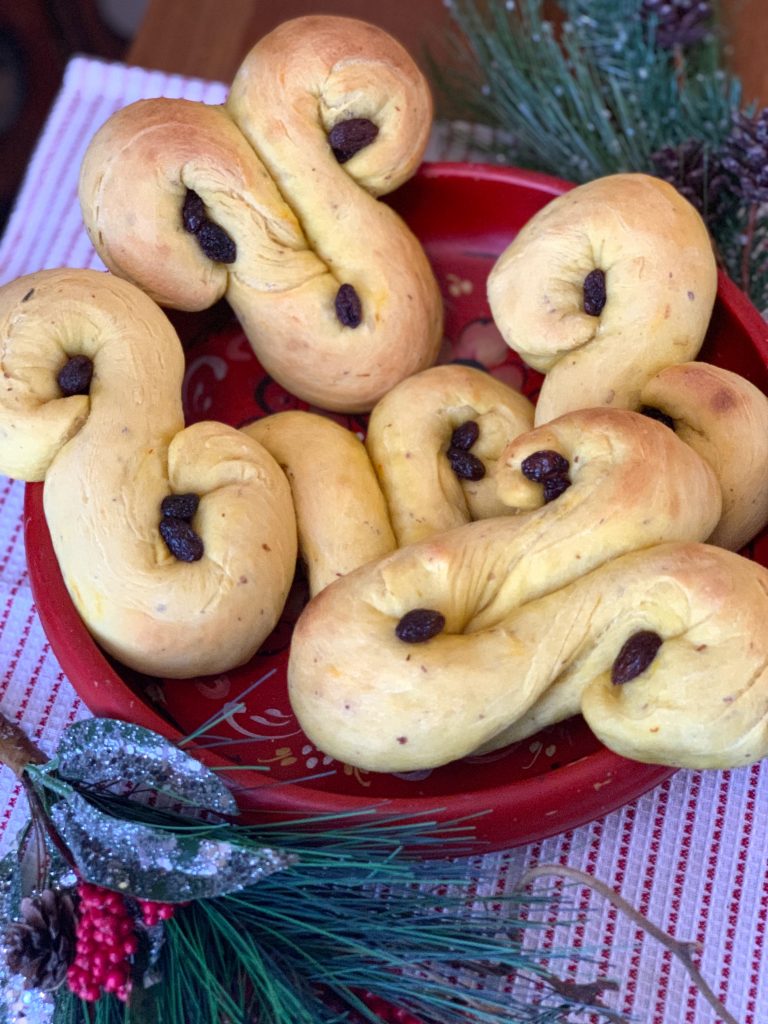
Roll out each piece and shape into the kind of lussekatter you want to make. Here is a chart to give you some ideas.
Place the buns on the prepared baking sheet, cover with a clean kitchen towel and rise again for another 45-60 minutes.
Preheat the oven to 425° Fahrenheit (210° Celsius).
Drain the raisins and decorate the buns as you wish.
Brush the buns with non-dairy milk, sprinkle with a little optional sugar and bake them in the oven (one tray at a time) for about 12-14 minutes until golden on top.
Let cool on a rack and eat as soon as possible with a nice cup (or two) of gløgg!
Ingredients
- 2 lbs (900 grams) all-purpose flour
- 2 cups (500 ml) soy or other non-dairy milk
- ¾ cups 150 grams sugar
- 1/2 teaspoon salt
- 1 gram saffron threads about 10-15 threads
- 2 ¼ teaspoon dry active yeast
- 1 stick + 2 tbsp (150 grams) butter diced + extra for brushing
- ½ cup (70 grams) raisins soaked in warm water, for decorating
- granulated sugar for topping (optional
Instructions
- Heat up about ¼ cup (70 mL) of the milk in a small pot, and add the saffron threads. Let bloom for about 30 minutes to draw out the color.Alternatively, heat up 1/2 cup water with 25 grams of sugar, whisk to combine Remove from heat and add the saffron. Let bloom for 1 hour or preferably overnight in the fridge.
- After 30 minutes, add the saffron-colored milk and the remaining milk along with all the other ingredients except the butter and raisins into the bowl of a stand mixer. Fitted with a dough hook, knead the dough for about 10 minutes until the dough gets firm and smooth and releases from the sides of the bowl.
- Add in the diced butter gradually and knead for another 10 minutes – the butter should be well integrated into the dough. At first, it will look really wet and messy but be patient and it will firm right back up.
- Cover the dough with a clean towel or plastic and let rise for about 1 1/2 hours or until double in size.
- Prepare three baking sheets lined with parchment paper or silpat.
- Sprinkle some flour on a clean work surface, pour the dough out onto the table and divide it into 20 equal pieces. Alternatively, roll out the dough to a rectangle 12 x 24 inches (30×60 cm) and using a pizza or pastry cutter, divide the dough into strips about 1.5 inches wide and 12 inches long.Roll out each piece and shape into the kind of lussekatter you want to make. Here is a chart to give you some ideas.
- Place the buns on the prepared baking sheet, cover with a clean kitchen towel and rise again for another 45-60 minutes.
- Preheat the oven to 425° Fahrenheit (210° Celcius).
- Drain the raisins and decorate the buns as you wish. Brush with a non-dairy milk and sprinkle with a little sugar (optional). Bake the buns in the middle of the oven (one tray at a time) for about 12-14 minutes until golden up top. Let cool on rack and eat as soon as possible with a nice cup (or two) of gløgg!


0 Comments