Ever wonder what the most popular bread in Norway is?
It is definitely kneippbrød.
The Story Behind Norway’s Beloved Whole Wheat Bread
Kneippbrød has been a staple bread in Norwegian cuisine for over a hundred years. It takes its name from Sebastian Kneipp, an influential 19th-century Bavarian priest and physician.
While Kneipp is widely recognized as a pioneer of naturopathic medicine and hydrotherapy, his legacy in Norway centers on something quite different: a revolutionary whole wheat bread recipe.
What made Kneipp’s approach groundbreaking was his insistence on using the entire grain—shell, kernel, germ, and all—in his bread-making process.
He advocated for a simple, wholesome diet centered around water and bread, leading many medical professionals to prescribe Kneipp’s whole wheat bread as a remedy for various ailments affecting the stomach, teeth, and blood.
The bread’s journey to Norway began when publisher Søren Mittet discovered the recipe during a hospital stay in Germany.
In 1895, a Norwegian baker named Hansen created the country’s first kneippbrød, unknowingly launching a national food tradition.
Today, Norwegians consume an astounding 60 million loaves annually—that’s at least one loaf per person each month!
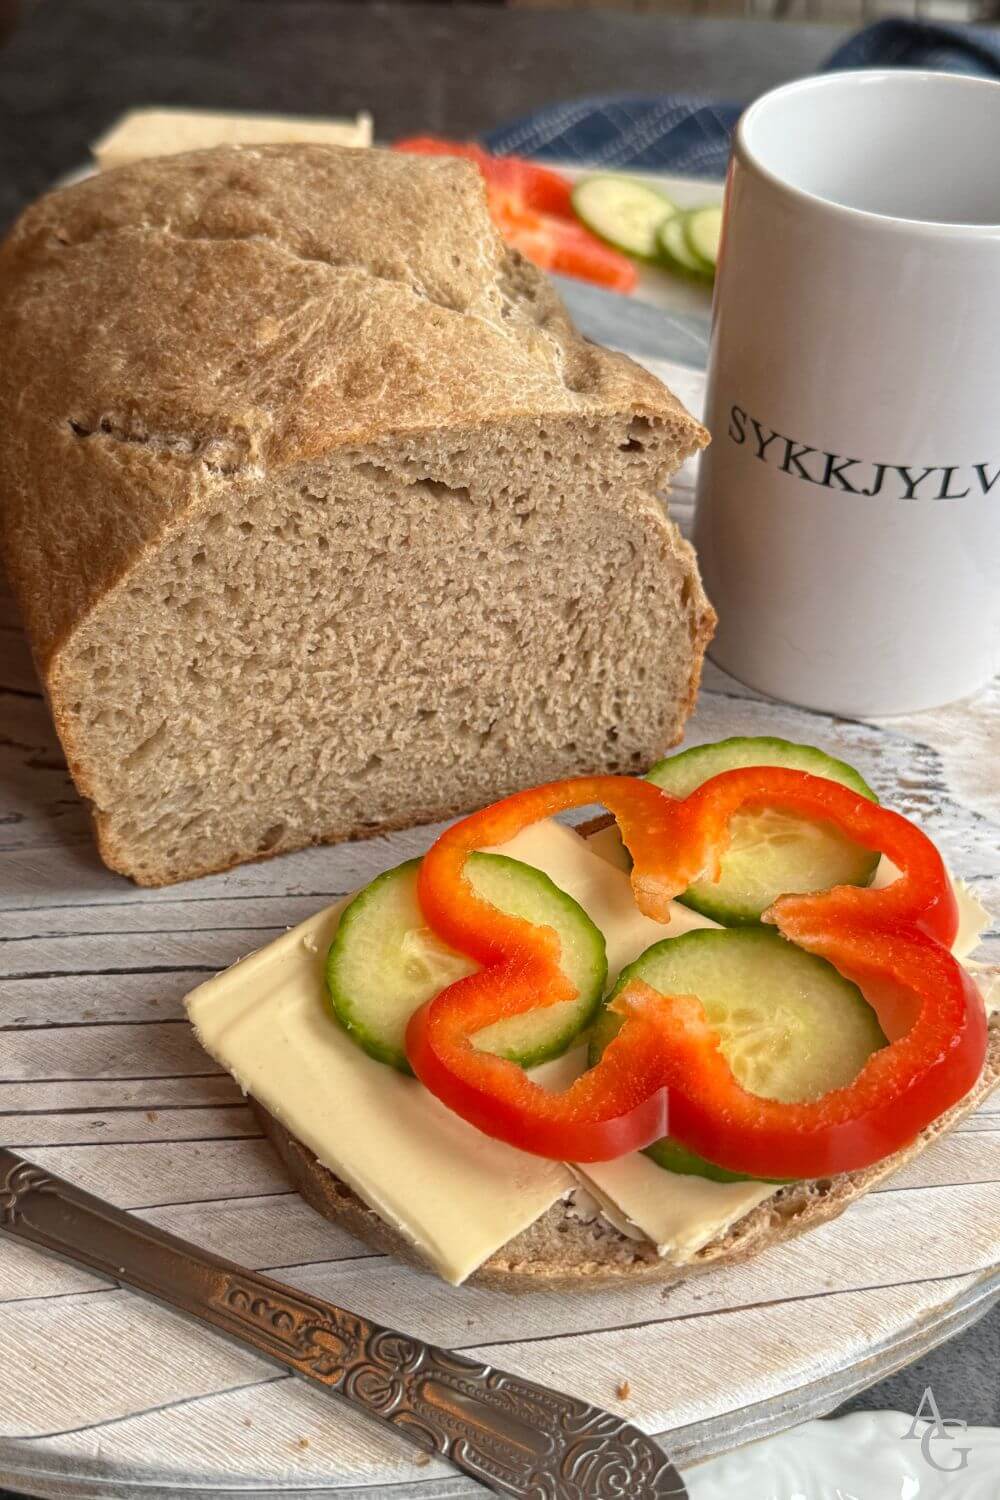
What makes kneippbrød unique is its careful blend of whole wheat and white whole wheat flour, typically mixed with skim milk as the liquid base.
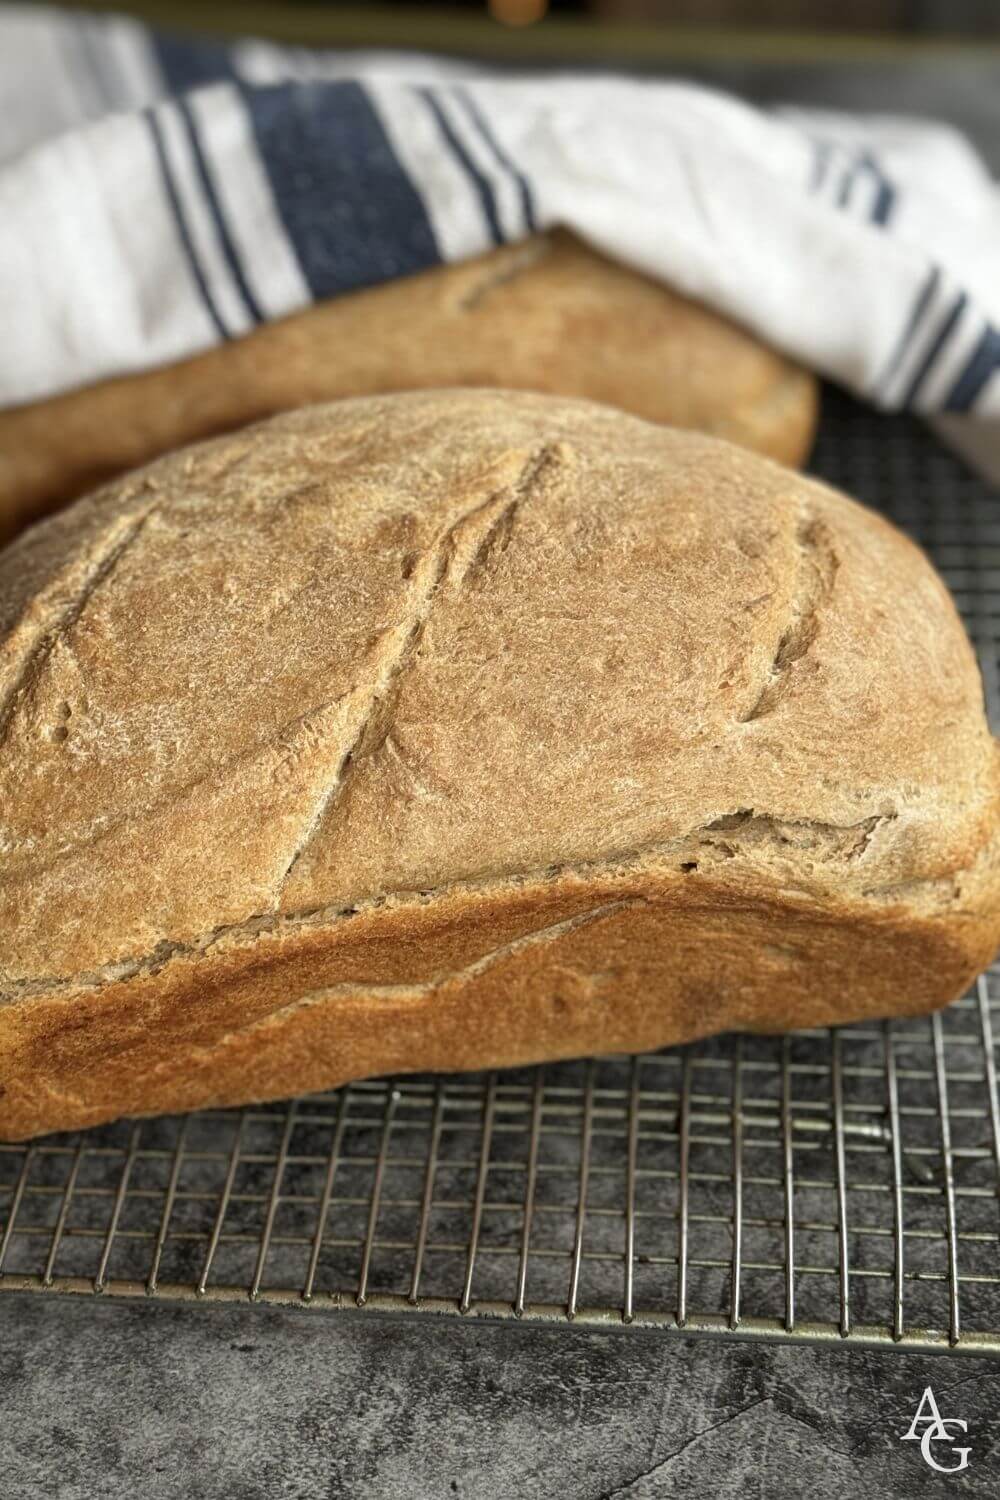
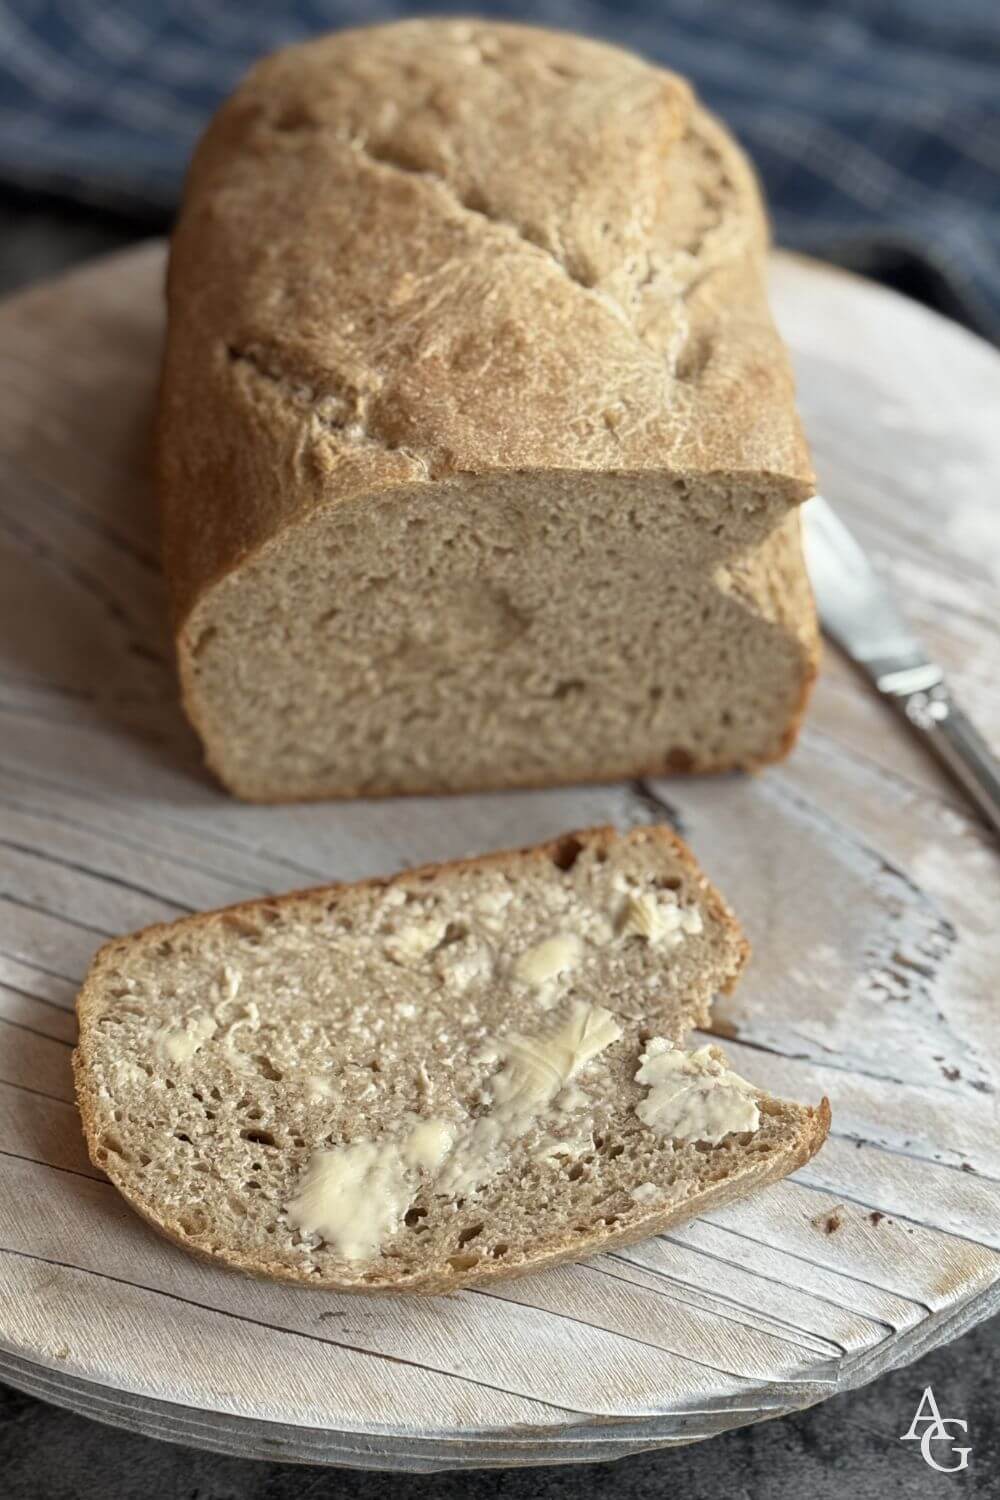
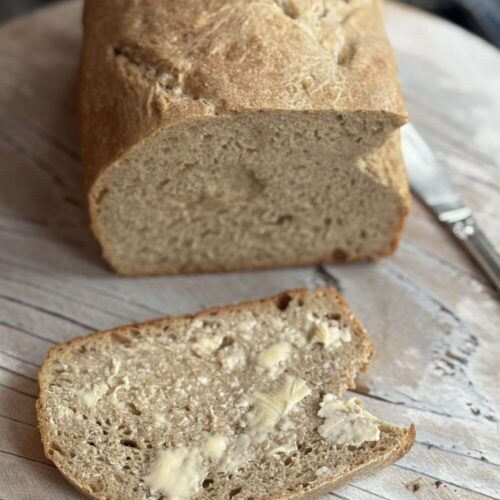
The result is a whole wheat bread with a distinctive crispy crust and remarkable texture that’s truly one of a kind.
This bread holds a special place in my childhood memories.
Unlike the homemade varieties my mother usually baked, kneippbrød was a rare treat from the local bakery. I would eagerly anticipate those special occasions when my mother, either in a particularly good mood or too busy to bake, would bring home a fresh loaf.
Perhaps it was this sense of occasion that made it taste even better!
After extensive research and experimentation, I’m proud to share my perfected kneippbrød recipe.
Finding an authentic recipe proved challenging, which makes me even more excited to offer this carefully tested version.
I decided to use a recipe that includes whole wheat, rye, and regular white flour. This produces a loaf most similar to the version I recall eating as a child.
There are also versions of grovt kneippbrød, which indicates that only whole wheat flour is used. This bread will turn out denser and slightly nuttier (a recipe for this will be coming to the blog soon!).
Additionally, I opted to use only water, not skim milk, making the recipe vegan, without compromising any of the authentic taste and texture!
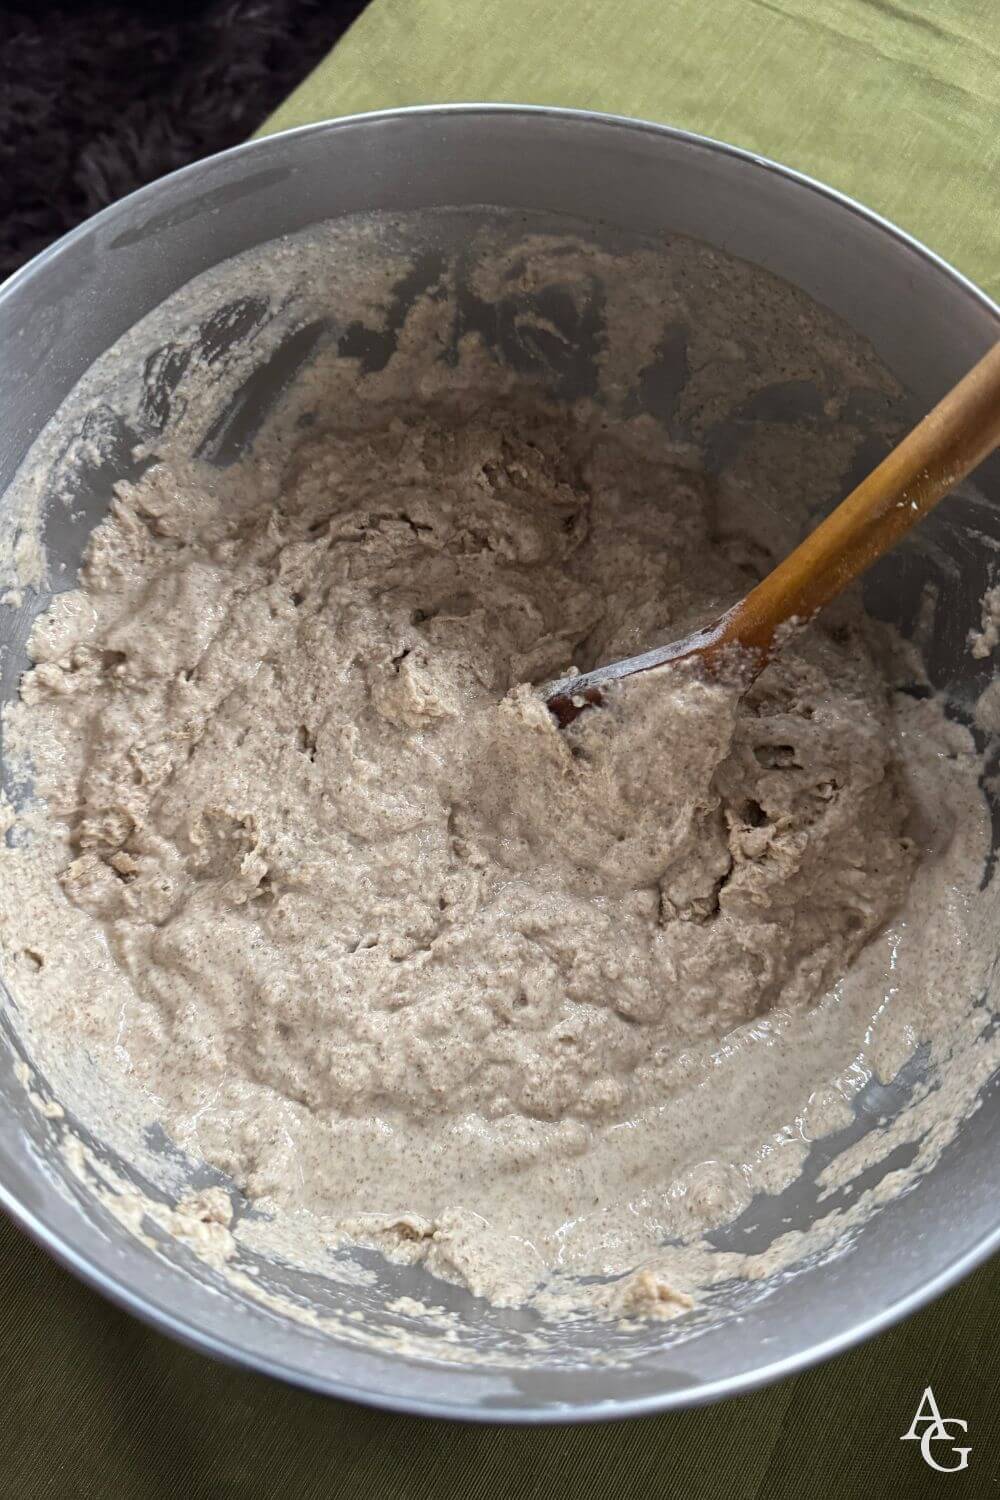
I find it important to soak the whole grain flours first—this prevents a crumbly texture and ensures a nice, juicy bread. Kneippbrød has a crispy crust, which gives it a nice contrast and texture.
A few Kneipp whole wheat bread baking tips:
You may need to adjust the liquid and flour ratios slightly based on your specific conditions.
If you’d like to try milk for the liquid to more closely resemble the authentic recipe, I’ve also had success using unsweetened almond and oat milk.
Watch your oven temperature carefully, as baking times can vary significantly.
When baking on the lowest rack, check the bottom of the bread after 30 minutes to prevent burning. Alternatively, you can try baking it on the second to lowest rack.
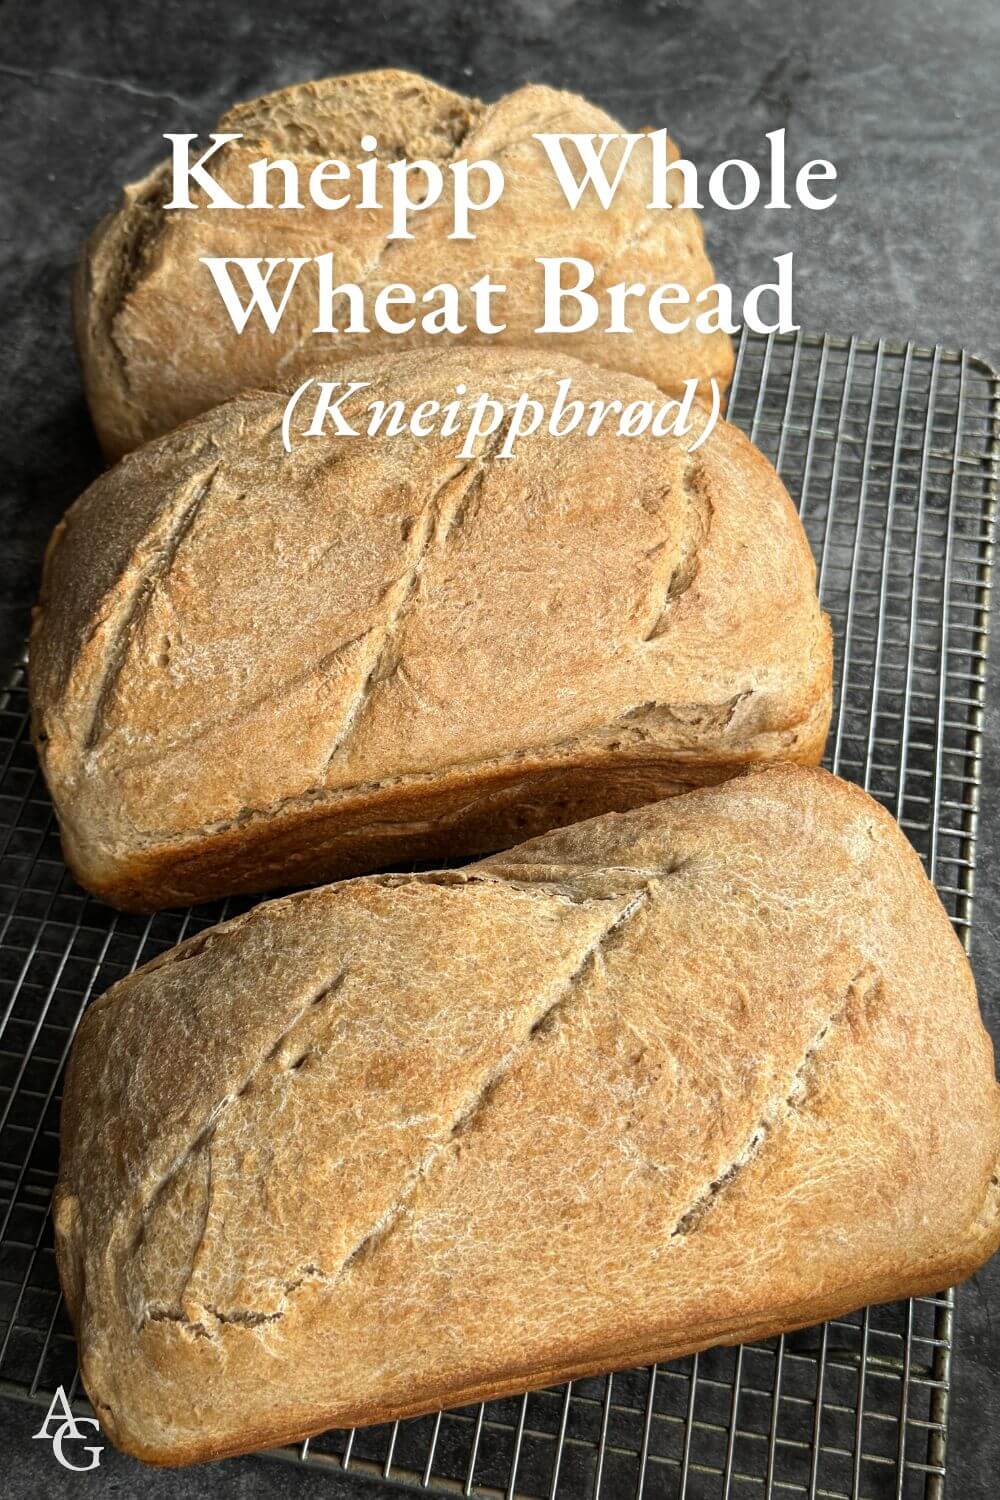
Kneippbrød (Kneipp Whole Wheat Bread)
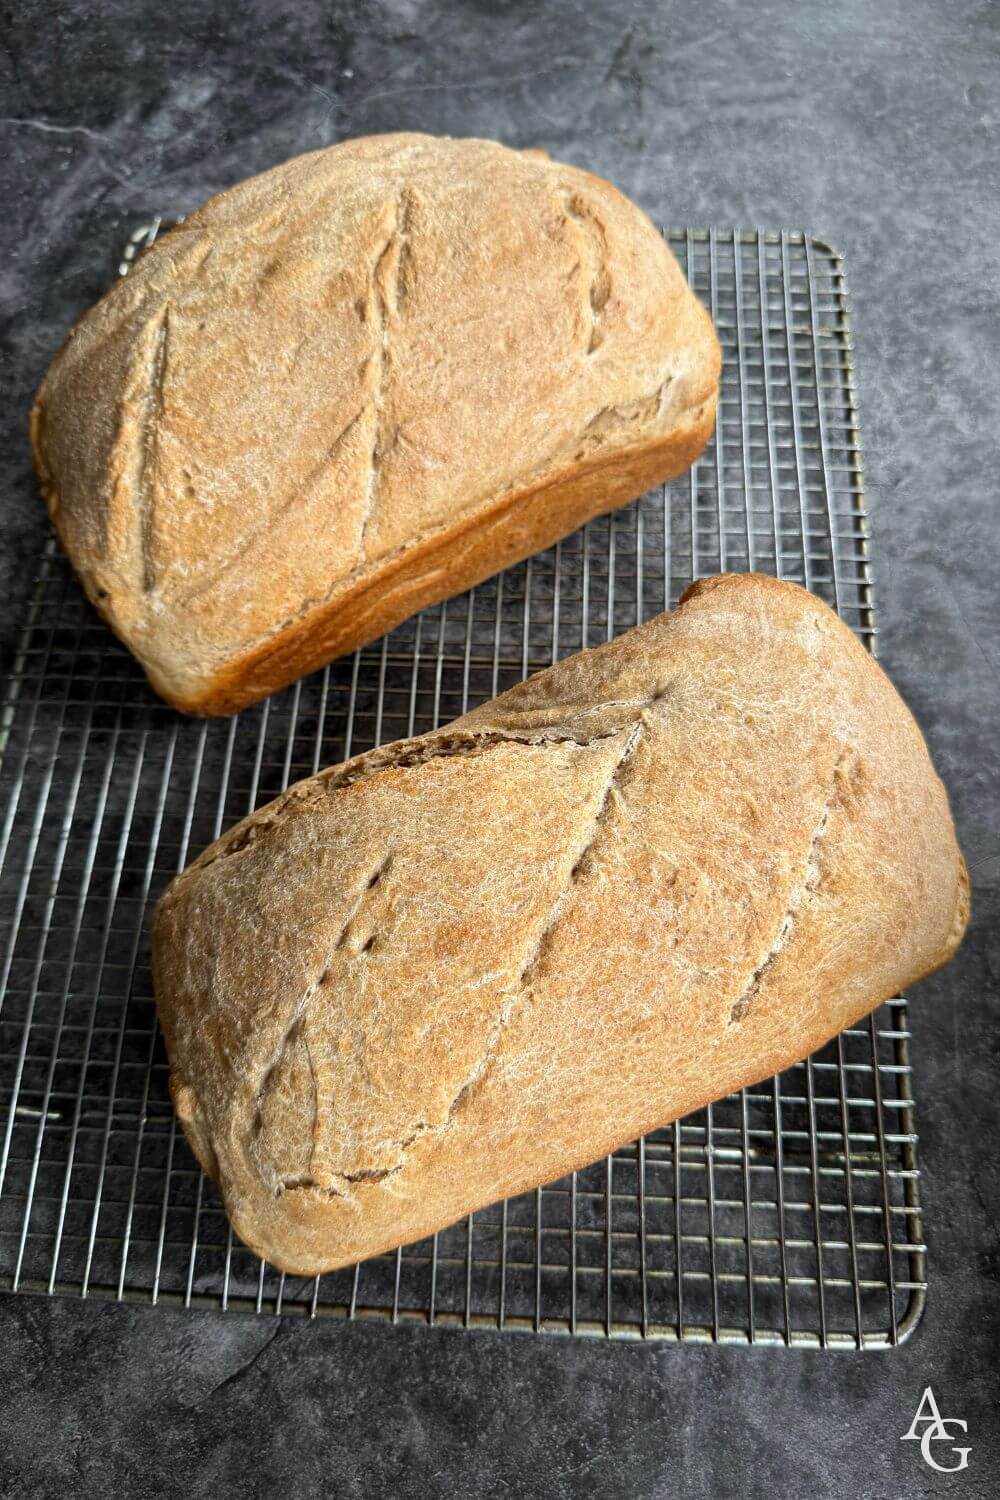
Makes 3 loaves
Ingredients
Step 1:
4½ cups (500g) white whole wheat flour
3½ cups (400g) whole wheat flour
2 cups (250g) rye flour
5¼ cups (12.5 dl) water
Step 2:
⅔ cups (1.5 dl) water
6 cups (800g) all-purpose flour, sifted
1 packet (2¼ teaspoon) dry active yeast
1 teaspoon sugar
1 tablespoon sea salt
4 tablespoons vegetable oil
Directions
Add all the ingredients in Step 1 in a large mixing bowl of a stand mixer and combine well using a wooden spoon. Cover with a lid or plastic wrap and let sit for at least 2 hours, or overnight.
Next, add the water, all-purpose flour, and yeast to the pre-soaked mixture in Step 1 and fit the stand mixer with a dough hook.
Knead for 10-15 minutes at low-medium speed. Add the salt and the oil and continue kneading for another 5 minutes.
The dough should be elastic, somewhat sticky, and keep its shape without breaking when you stretch it out.
Cover the bowl with a clean kitchen towel and leave it to rise in a warm spot for at least 1½ hours until doubled in size. The time this takes will vary depending on the temperature of the dough and your kitchen.
Meanwhile, generously grease three 9×5-inch loaf pans and set aside. (I just brush the pans with vegetable oil, but you can use vegan butter as well).
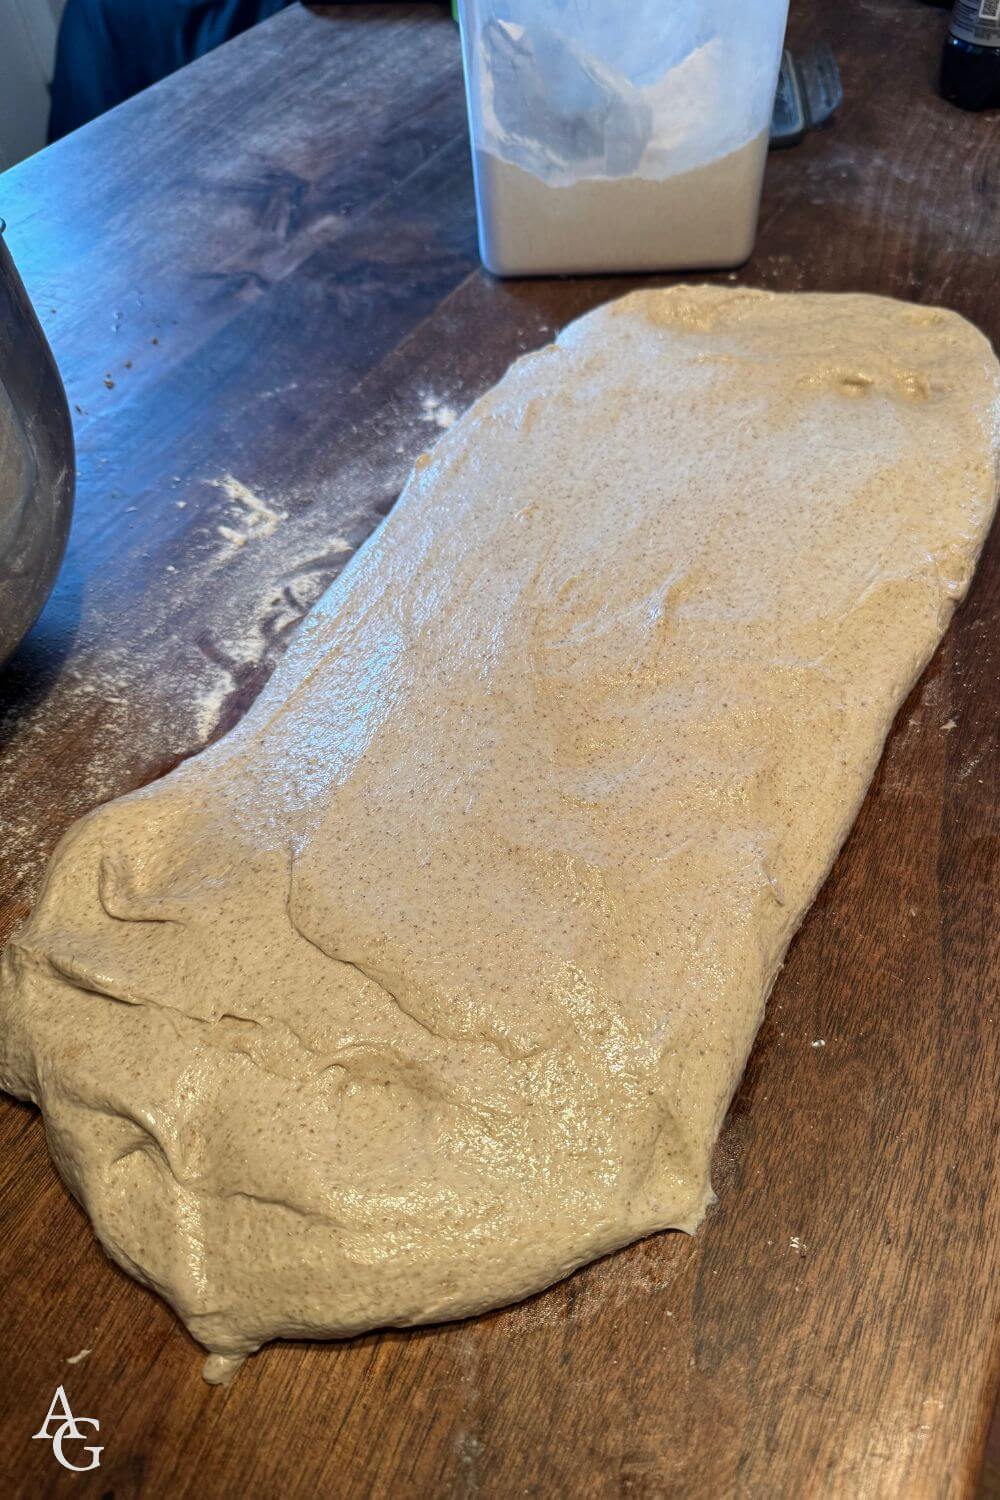
When the dough has risen sufficiently, transfer it onto a lightly floured clean work surface.
Using your hands, stretch the dough into the shape of a rectangle, and fold the sides of each long end towards the middle as shown in the photos below:
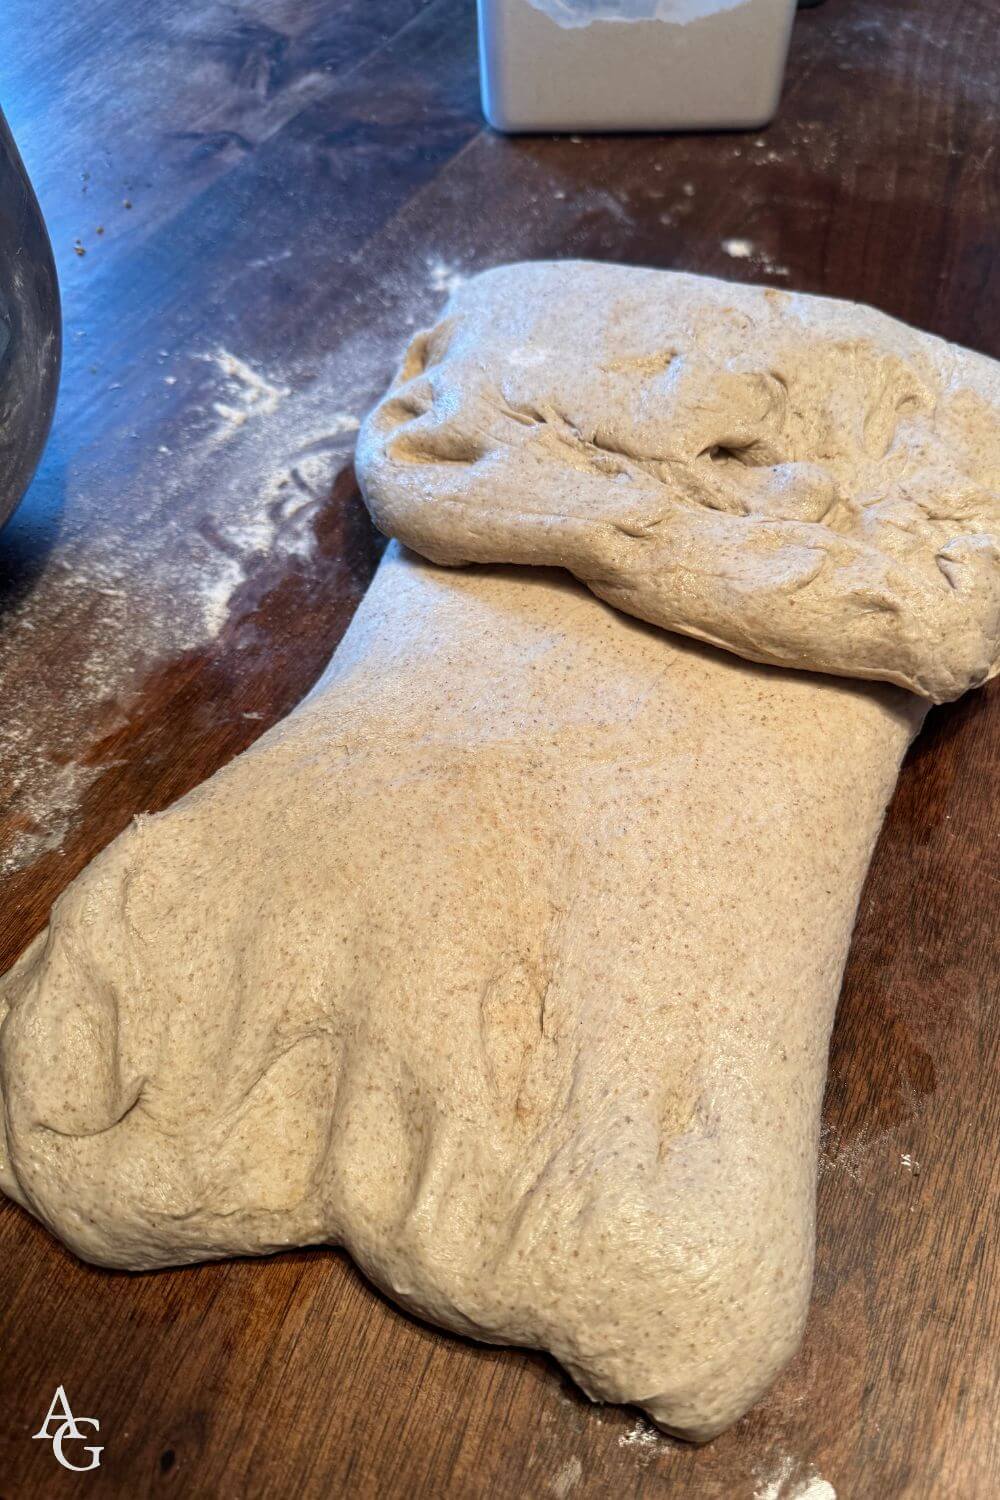
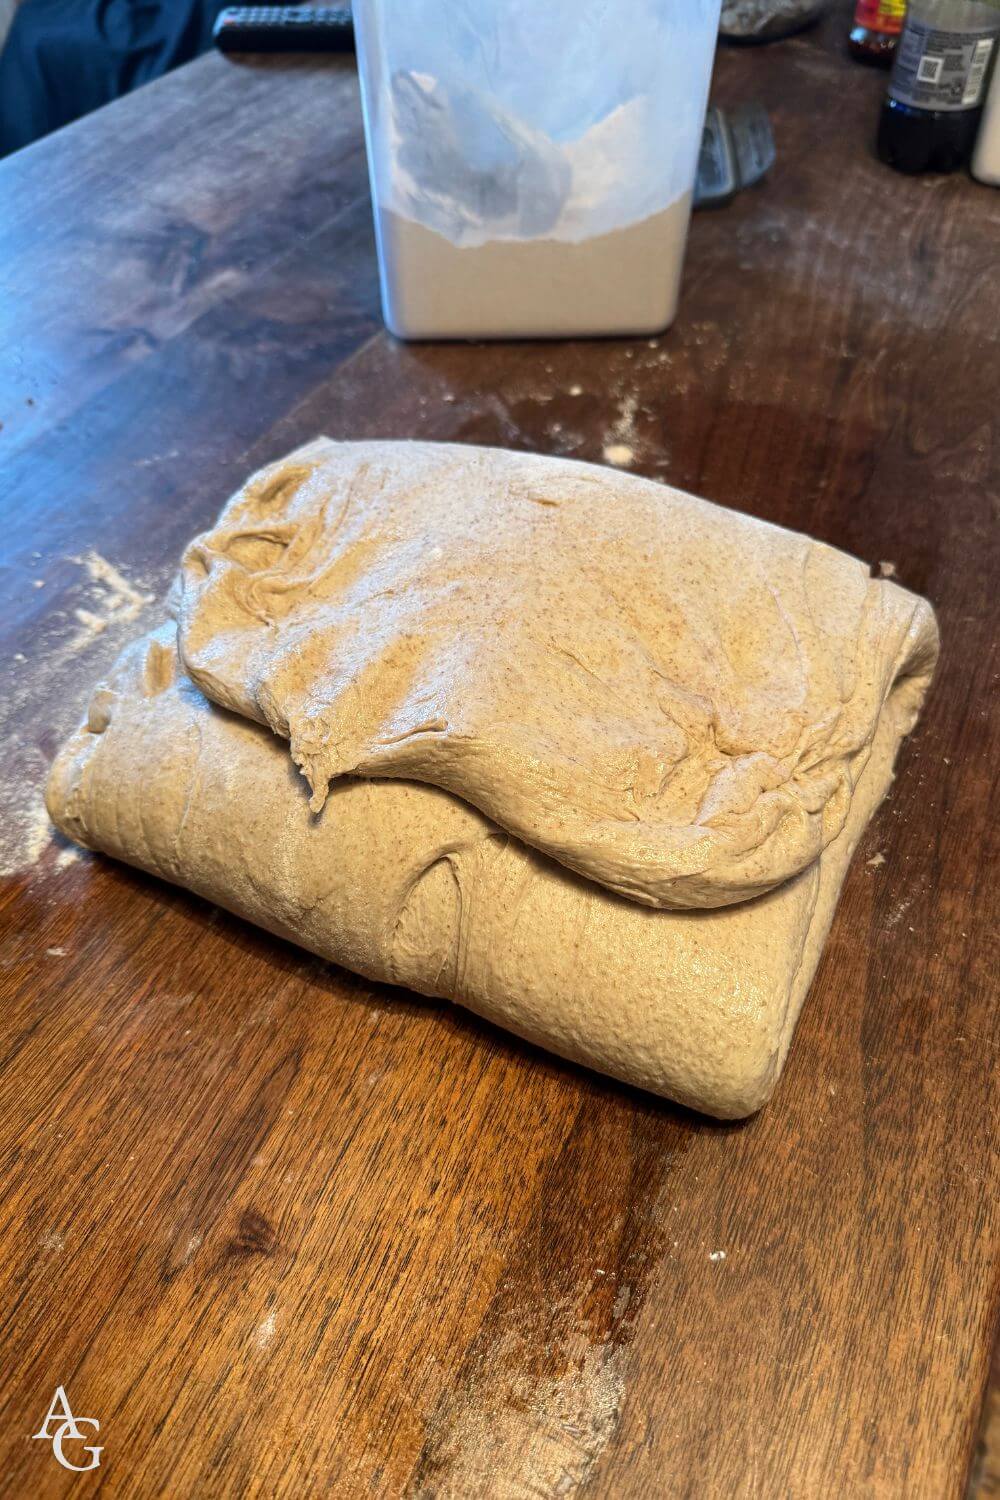
Continue this process for about 3-4 times. You will feel that the dough tightens up and will look a bit puffed up like this:
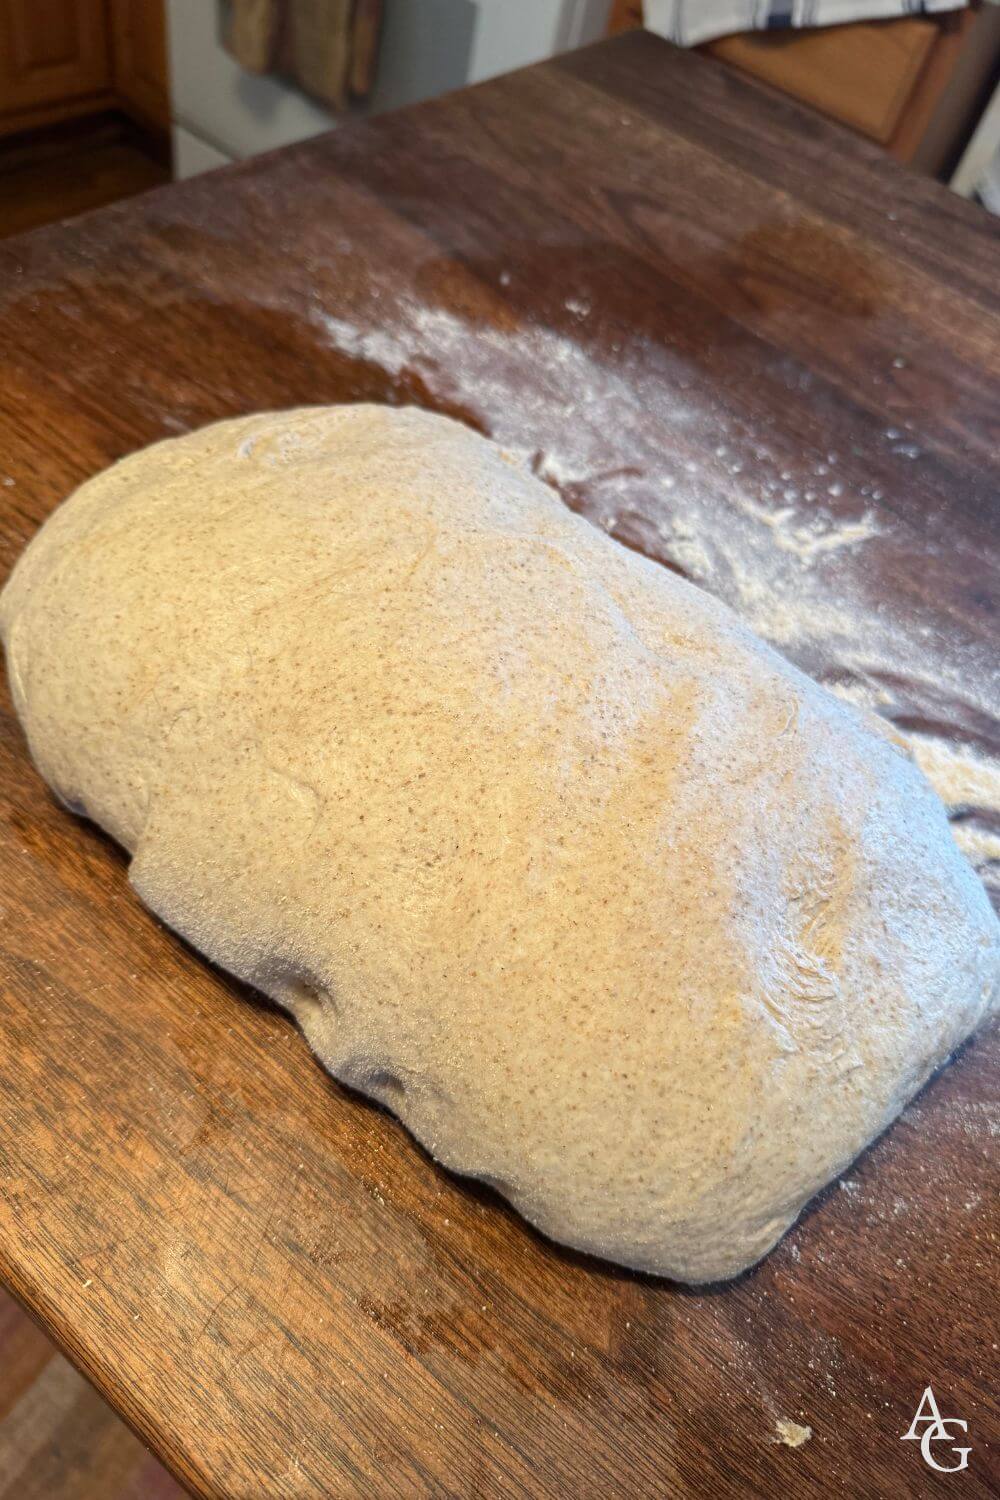
Divide the dough into 3 equal pieces using a pastry knife or a doughcutter.
Shape them into oval loaves and place in the prepared loaf pans.
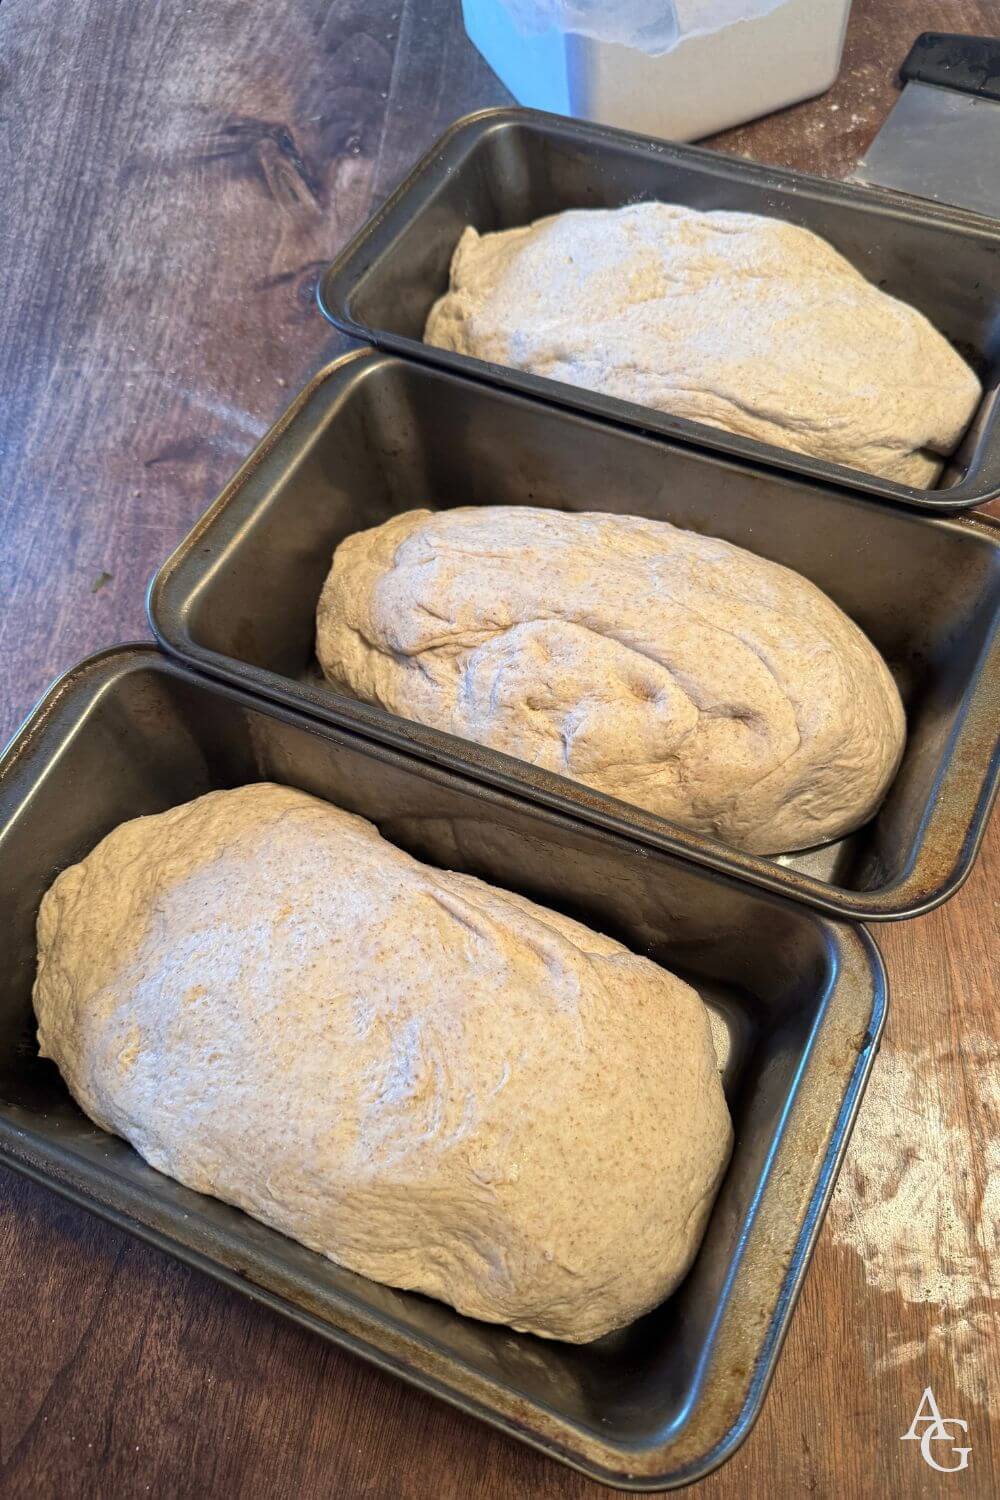
Cover with a clean kitchen towel and let the loaves rise for a second time for about 45 minutes.
Meanwhile, preheat the oven to 480°F (240°C).
Right before it’s time to bake the bread, brush the tops with a little water and score using a lame (bread scoring tool), razor blade, or very sharp knife. Make swift, confident cuts about ¼ to ½ inch deep into the dough surface. I find that dusting the blade or knife with a little flour prevents it from sticking to the dough.
Place the loaves in the bottom rack of the preheated oven and immediately turn down the temperature to 420°F (210°C).
Bake for about 35 minutes until golden on top (baking time will vary depending on your oven).
Remove from the loaf pans and let cool on a rack.
Let the bread cool completely before slicing (about 2 hours).
If you want to avoid a very crispy crust, cover the loaves with a clean kitchen towel.
This bread freezes well!
More Recipes to Try…
Whole Grain Pull-Apart Rolls (Halvgrovt Brytebrød)
Norwegian Whole Grain Super Bread
Havrebrød – Norwegian Oat Bread
Kneippbrød (Kneipp Whole Wheat Bread)
Ingredients
Step 1:
- 4½ cups (500g) white whole wheat flour
- 3½ cups (400g) whole wheat flour
- 2 cups (250g) rye flour
- 5¼ cups (12.5 dl) water
Step 2:
- ⅔ cups (1.5 dl) water
- 6 cups (800g) all-purpose flour, sifted
- 1 packet (2¼ teaspoon) dry active yeast
- 1 teaspoon sugar
- 1 tablespoon sea salt
- 4 tablespoons vegetable oil
Instructions
- Add all the ingredients in Step 1 in a large mixing bowl of a stand mixer and combine well using a wooden spoon. Cover with a lid or plastic wrap and let sit for at least 2 hours, or overnight.
- Next, add the water, all-purpose flour, and yeast to the pre-soaked mixture in Step 1 and fit the stand mixer with a dough hook.
- Knead for 10-15 minutes at low-medium speed. Add the salt and the oil and continue kneading for another 5 minutes.
- The dough should be elastic, somewhat sticky, and keep its shape without breaking when you stretch it out.
- Cover the bowl with a clean kitchen towel and leave it to rise in a warm spot for at least 1½ hours until doubled in size. The time this takes will vary depending on the temperature of the dough and your kitchen.
- Meanwhile, generously grease three 9×5-inch loaf pans and set aside. (I just brush the pans with vegetable oil, but you can use vegan butter as well).
- When the dough has risen sufficiently, transfer it onto a lightly floured clean work surface.
- Using your hands, stretch the dough into the shape of a rectangle, and fold the sides of each long end towards the middle as shown in the photos below:
- Continue this process for about 3-4 times. You will feel that the dough tightens up and will look a bit puffed up like this:
- Divide the dough into 3 equal pieces using a pastry knife or a doughcutter.
- Shape them into oval loaves and place in the prepared loaf pans.
- Cover with a clean kitchen towel and let the loaves rise for a second time for about 45 minutes.
- Meanwhile, preheat the oven to 480°F (240°C).
- Right before it’s time to bake the bread, brush the tops with a little water and score using a lame (bread scoring tool), razor blade, or very sharp knife. Make swift, confident cuts about ¼ to ½-inch deep into the dough surface. I find that dusting the blade or knife with a little flour prevents it from sticking to the dough.
- Place the loaves in the bottom rack of the preheated oven and immediately turn down the temperature to 420°F (210°C).
- Bake for about 35 minutes until golden on top (baking time will vary depending on your oven).
- Remove from the loaf pans and let cool on a rack.
- Let the bread cool completely before slicing (about 2 hours). If you want to avoid a very crispy crust, cover the loaves with a clean kitchen towel.


Isn’t it so rewarding to embark on recipe development for a dish and then be delighted with the results? Nice work!
Also, I added Arctic Grub to my blogroll the other day! You do such a great job putting foods into context.
Thank you so much!! I will go ahead and put your blog on mine as well – I’ve been meaning to update my blog roll for a while anyway. Thanks again for the nice compliment, that means a lot! 🙂
These vreads that aren’t that dark also look amazinbg, tasty & good for us! 🙂 Yummm!
This looks great! I would like to follow your footsteps and make this bread; can you please let me know:
– what is the weight of your packet of instant yeast?
– what is the size of 1 loaf tin?
Hi Darek! Many thanks for stopping by my blog and for your comment! I am happy to hear you will try my bread out! 1 packet of yeast weighs 7grams (or 1/4 oz) and measures 2 1/2 tsps. A regular 1 lb loaf pan measures 8 1/2 x 4 1/2 inches but I think the one I used was 9×5 inches. Either one will work just fine. Hope that was helpful – let me know how you go! Cheers, Sunny
Hi Sunny
I have just spent 10 minutes writing long comment which was not published on your website so instead of writing it again, I will just say that recipe worked, however I didn’t find White Whole Wheat flour in Dublin! I have no idea what is the difference between these two and how unbleached flour can be white… Anyway, I bought two packs – one organic Whole Wheat flour fine and second same but coarse. It worked fine, but some parts of the bread are little bit wet;( however the bread is really tasty, and very unique flavor. Tomorrow, Norwegian person at work will try it and give me final verdict, she loves Kneippbrod and can’t wait to try (in Dublin it’s probably impossible to find it).
Thank you for delicious afternoon~!
Hi Darek, so happy you tried out my recipe – thank you! Keep in touch, loved hearing your feedback! Sunny 🙂
Dear Sunny,
I’m going to be attempting to make Knieppbrod for my family TODAY, after enjoying it immensely every time we’ve been to Norway. Can you please tell me if it’s truly “rapeseed oil” and not “grapeseed oil” that you use? I’m having a difficult time finding rapeseed oil (if that’s not a typo in your recipe). Do you know what can be substituted for rapeseed oil if I can’t find it? I bought Grapeseed Oil AND Canola Oil, after our son looked online that the components of rapeseed oil was close to Canola oil. Can’t wait to hear from you!
Hi Kristine! Great to hear that you will be baking kneippbrød today, how exciting! It was not a typo when I wrote “rapeseed”, I prefer it to canola because it is typically higher quality but I also know it’s not always easy to find. That said, you can successfully use canola and it won’t affect the outcome at all. Happy baking and let me know how the bread comes out! 🙂
I have baked the bread 5 times now. But I really think there is a mistake regarding the liquid. I think the correct amount of water should be 2 cups.
Hi Oystein, did it come out dry all five times? It really depends on the humidity of where you live, for instance here in the U.S. it is more humid than in Norway many places, and also on the day, etc. I also recommend adding more or less liquid and flour until you have a dough that looks good to you… Thanks for your comment, I appreciate it and will note it in the original post for readers who try it in the future!
First time, I had to add liquid after I added about 6 cups of flour, next 4 times, I started with 4 cups of liquid (and I am a Norwegian living in Connecticut missing the Norwegian breads).
Hmmm good to know Øystein – sorry about the measurements not working for you, I’m going to do another test run of these later this month and see what I come up with! Thanks again for the heads up and I hope you still came out with some decent loaves!
Hodgson Mill seems to have been acquired by another company and maybe isn’t making this flour anymore? Looks like what USA-folks would call a Graham-style flour, and maybe in Ireland a coarser, whole wheat grain flour like for brown bread.
You can use Bob’s Red Mill whole wheat flour or King Arthur’s or any whole wheat flour really… I like to choose an artisan/organic flour as often as possible 🙂