As a native Norwegian and professionally trained chef, few celebrations bring me as much joy as Fastelavn, our Nordic version of Shrovetide or Fat Tuesday.
Fastelavn means “the evening before Lent” and this festival has been explored in a previous post. However, today I’m excited to share deeper insights into this centuries-old tradition that has captivated Scandinavian hearts since the 1500s.
One of the most fascinating aspects of Fastelavn is the tradition of fastelavnsris—decorated birch twigs.
Long before Christianity reached Norwegian shores, these leafless birch twigs were believed to possess powerful fertility magic.
Our ancestors would gently strike or rise (meaning to spank in Norwegian) everything from farmland to cattle and even people with these twigs, believing it would ensure abundance in the coming year.

Young women and those hoping for children were particularly sought after for this ritual. It became a playful custom for young men to tap women they met with the twigs, and couples would participate in this symbolic exchange.
Children were even granted the special privilege of waking their parents with a morning rising. The price for this honor was always a freshly baked cardamom bun, thus cementing the connection between fastelavnsboller and this unique custom.
In modern Norway, we still decorate our homes with colorful fastelavnsris, though they’re now adorned with bright feathers and paper decorations.

Another lesser-known tradition includes the “hitting of the cat out of the barrel” (slå katten ut av tønna), similar to a piñata. This tradition has evolved from medieval practices into a cheerful children’s game using candy-filled barrels.
At the heart of Fastelavn lies the beloved fastelavnsboller, or carnival buns, also known as Shrovetide buns. These are more than pastries; they’re a cultural touchstone that marks the beginning of the Lenten season across Scandinavia. Each Nordic country has developed its own distinctive take on these Shrovetide treats.
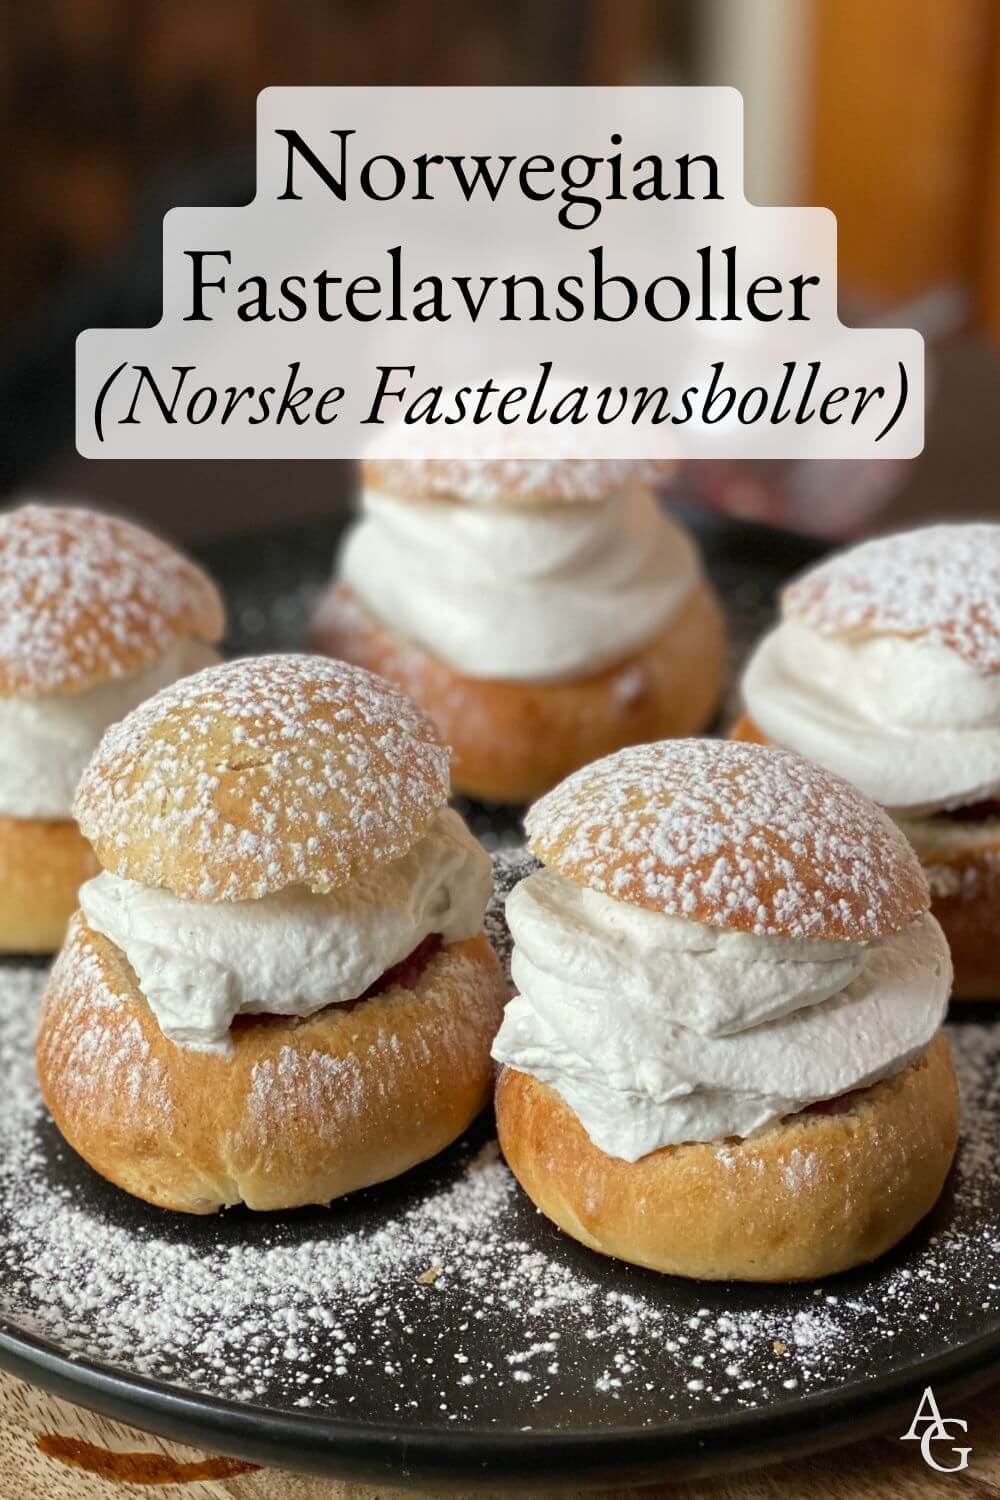
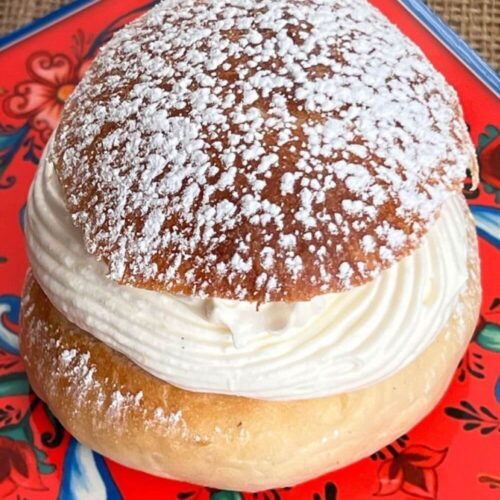
The Norwegian fastelavnsboller reflects our cultural preference for elegant simplicity.
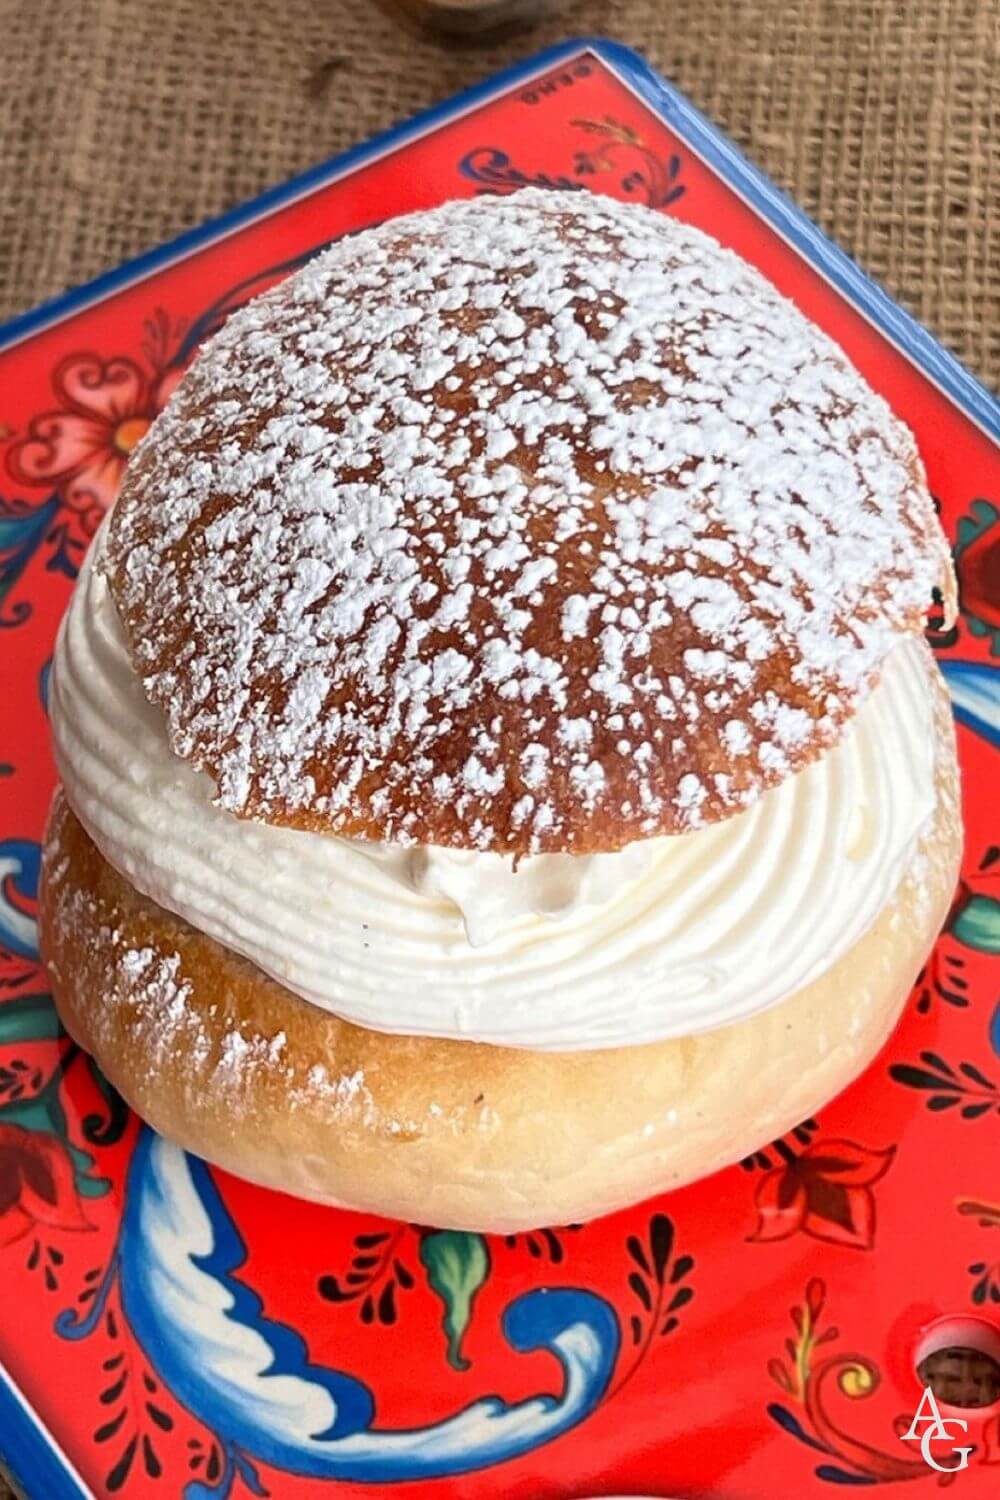
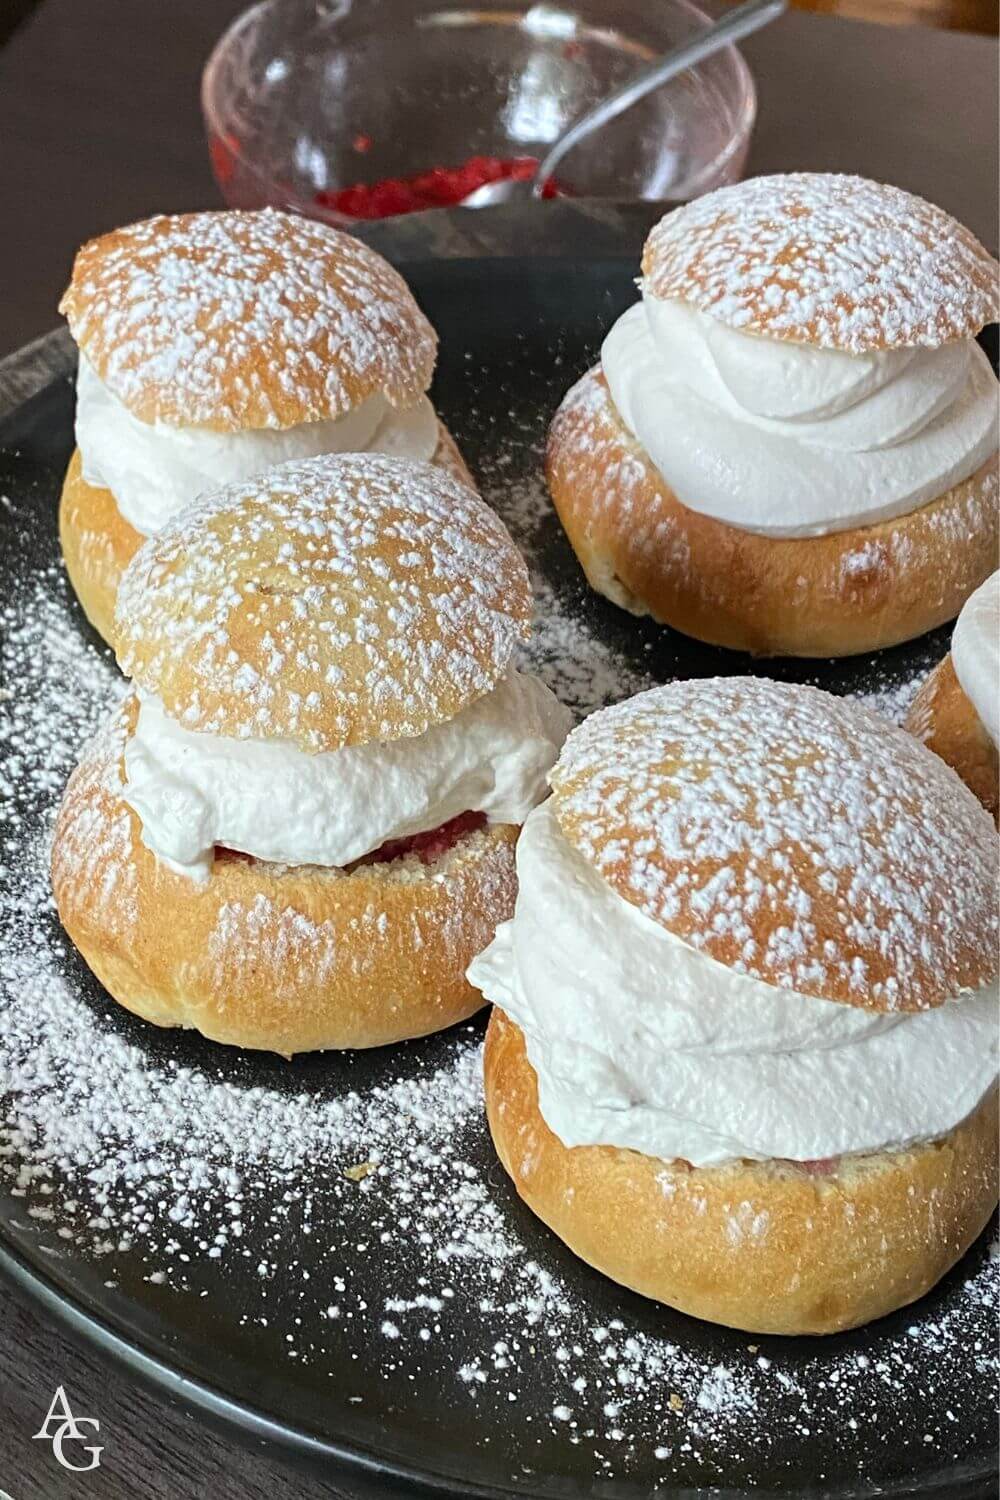
We favor a light, cardamom-scented wheat bun split and filled with fresh whipped cream and a simple berry jam, typically raspberry or strawberry. A light dusting of powdered sugar crowns this understated masterpiece.
This minimalist approach allows each element to shine: the subtle warmth of cardamom, the richness of fresh cream, and the bright acidity of Nordic berries.
The Danes are perhaps the most enthusiastic celebrants. They transform Fastelavn into a full-fledged festival with elaborate costumes, traditional games, communal singing, and feast tables that groan under the weight of seasonal delicacies.
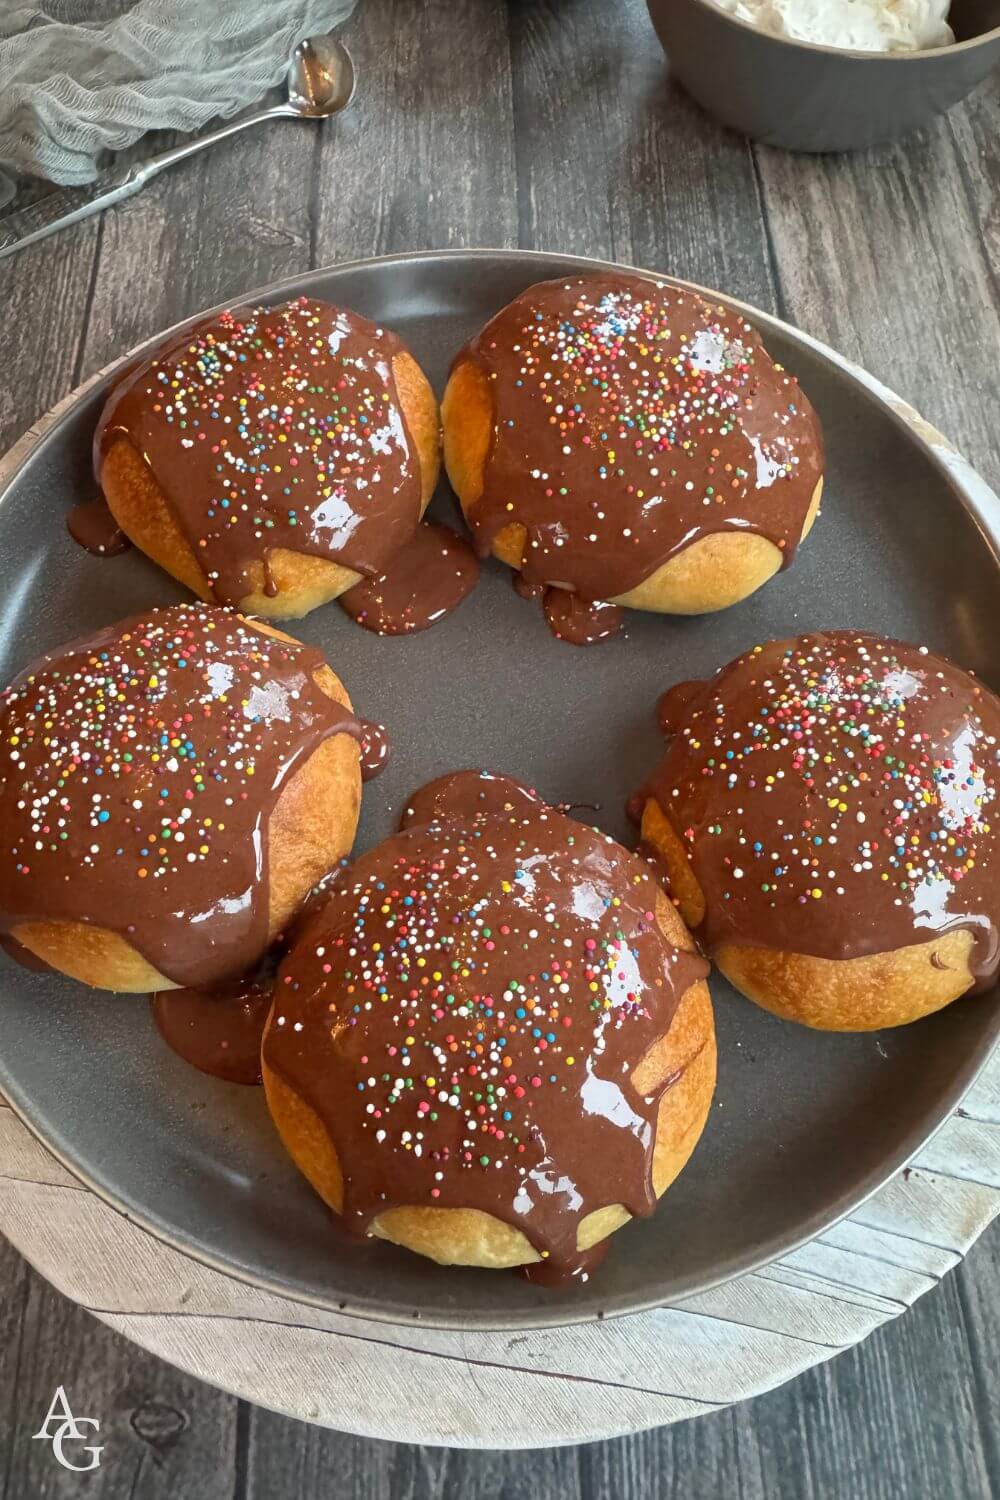
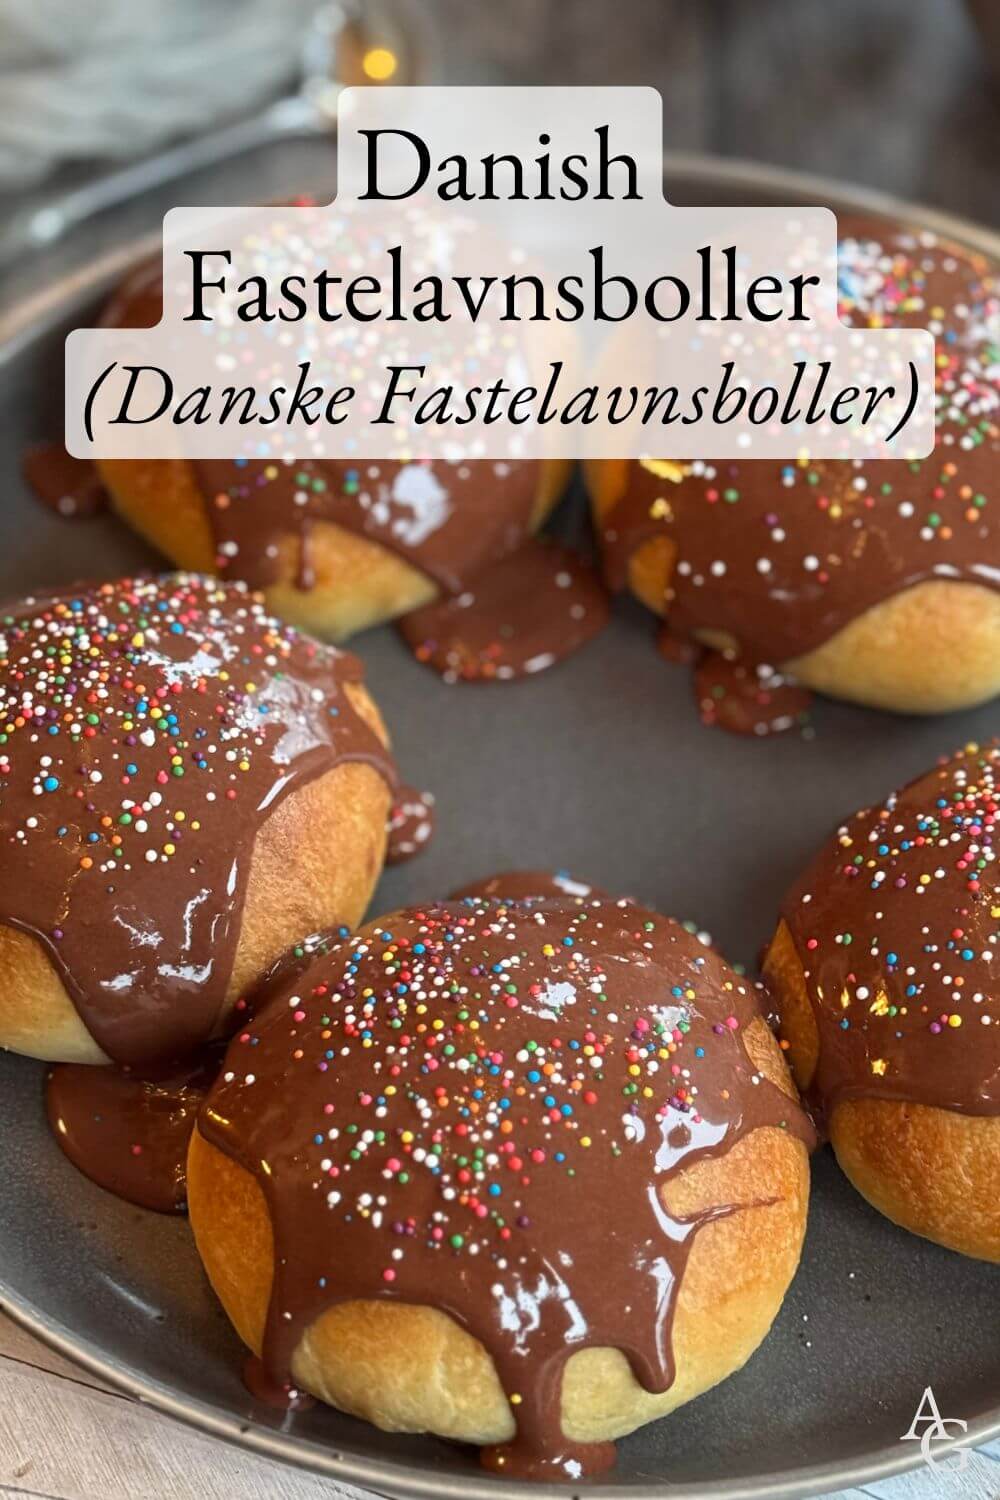
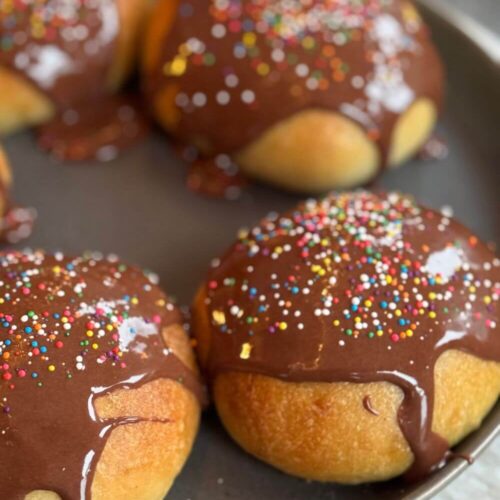
It’s no surprise then that Danish fastelavnsboller is an exercise in delightful extravagance. Presented as elaborate constructions, often featuring chocolate-glazed tops, various flavored creams, and multiple layers of fillings.
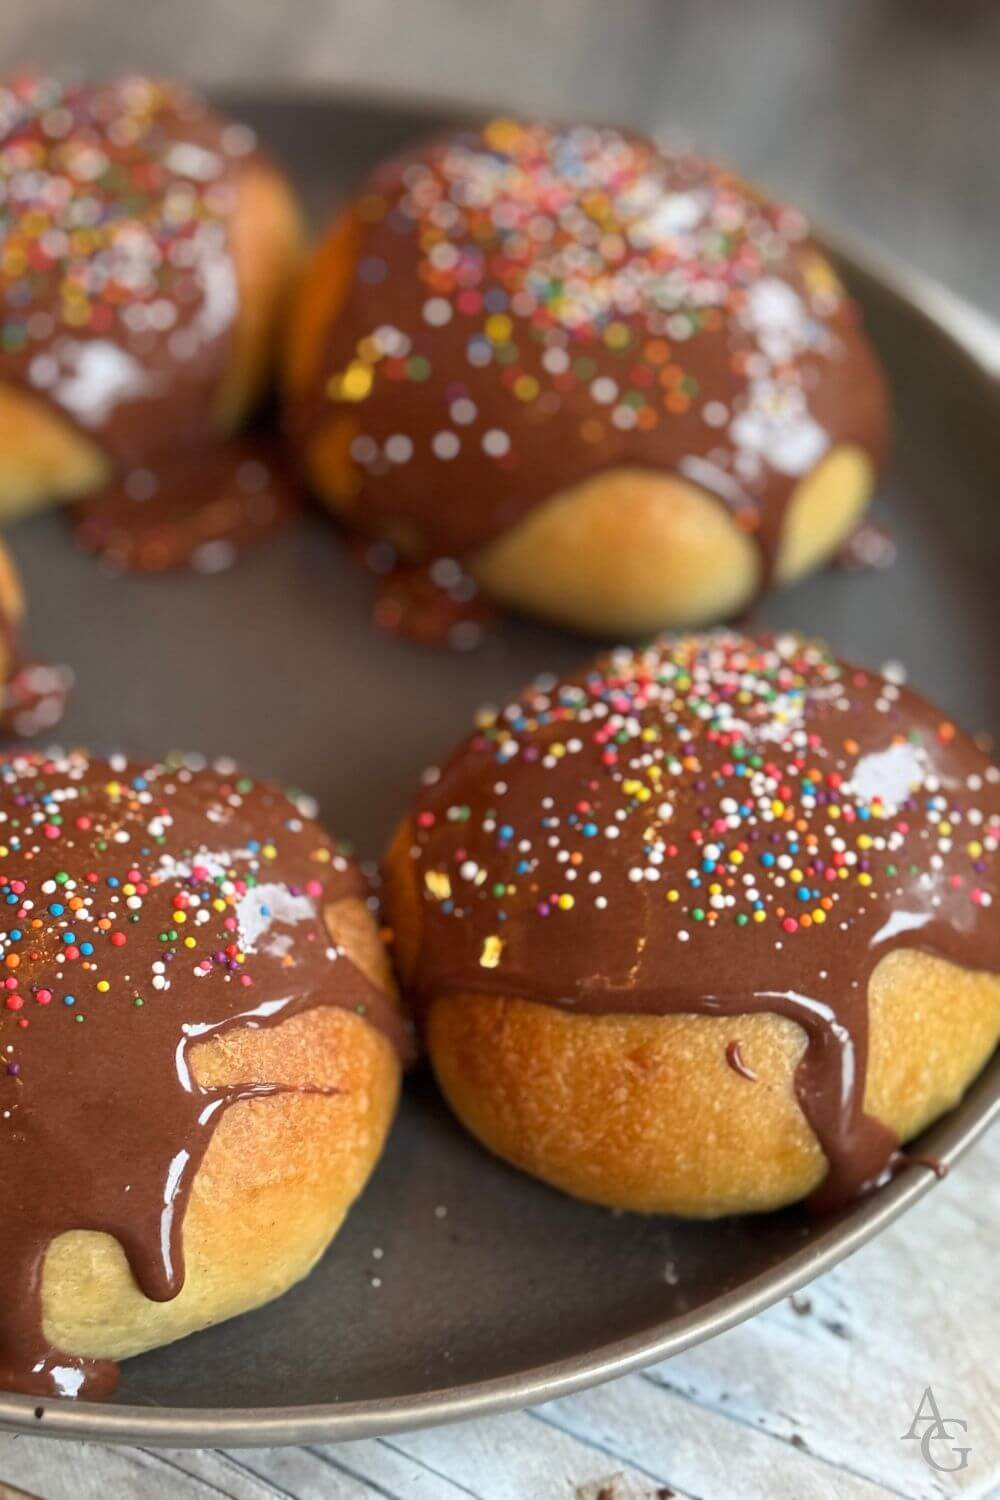
Their version might include vanilla custard (crème patissière), whipped cream, and jam, all harmoniously layered within the cardamom bun. Some Danish bakers even incorporate marzipan or chocolate cream, creating an intensely rich treat that perfectly suits the carnival atmosphere of Danish Fastelavn celebrations.
The Swedish semla takes yet another approach. Their distinctive addition of almond paste (mandelmassa) creates an equally indulgent filling that sets them apart from their Scandinavian cousins.
The bun is first hollowed out and filled with this rich almond mixture, then topped with generous swirls of whipped cream, and finally dusted with powdered sugar. Some modern Swedish bakeries have begun experimenting with variations like chocolate, vanilla custard, or even saffron-flavored fillings, though traditionalists stick to the classic almond version.
If you want hands-on experience baking both Norwegian and Swedish versions, check out my on-demand cooking class Norway vs Sweden Part I Cream Puffs. You’ll even learn how to make marzipan from scratch!
Whether you prefer the elegant simplicity of Norwegian fastelavnsboller, the festive elaboration of the Danish interpretation, or the distinctive almond notes of a Swedish semla, each style offers its own rewarding experience.
In my dairy-free adaptations, I honor the Norwegian tradition of simplicity, letting the quality of each component speak for itself.
For the Danish version, you’ll get a recipe for egg-free pastry cream—you won’t believe how good it tastes!
These reimagined fastelavnsboller emerged exactly as I hoped: pillowy soft, deeply aromatic, and bursting with flavor. The hearty cream filling creates an intensely satisfying contrast to the light, cardamom-scented bun.
As someone who has prepared countless traditional versions, I can honestly say these dairy-free buns stand proudly alongside their conventional counterparts.
I must warn you though—speaking both as a chef and a Norwegian who grew up cherishing these treats—limiting yourself to just one fastelavnsbolle is a test of willpower that even the most disciplined food professionals struggle with!
Norwegian Fastelavnsboller (Norske Fastelavnsboller)
Makes 16 buns
Ingredients
For the buns:
4 cups (600g) all-purpose flour
½ cup (120g) sugar
1 packet (2¼ teaspoons) active dry yeast
1 heaping teaspoon ground cardamom
¼ teaspoon salt
3 tablespoons Just Egg (or 1 flax egg prepared by mixing 1 tablespoon ground flax seeds with 3 tablespoons water)
2 cups (5 dl) non-dairy milk
1 stick (113g) vegan butter, chilled and diced
Additional butter and non-dairy milk for brushing the top of the buns
For the macerated strawberry filling:
1 lb (450g) strawberries, cleaned, hulled, and sliced
⅓ cups (70g) sugar
Juice from ½ lemon
For the whipped cream:
1 16.9 oz container (500 mL) vegan whipping cream like Country Crock, Violife, or Califa
3-4 tablespoons powdered sugar, or to taste
1 teaspoon vanilla extract or paste
Additional powdered sugar for decoration
Directions
To make the buns:
Line two baking sheets with parchment paper and set aside.
Add all the ingredients except the butter to the bowl of a stand mixer fitted with the dough hook. Start kneading slowly for 5 minutes, then increase the speed to medium for another 5 minutes.
Add the chilled butter and knead for another 10 minutes until a smooth dough forms.
Cover the bowl with a clean kitchen towel or cling wrap, and let sit in a warm spot to rise until doubled in size, about 2 hours.
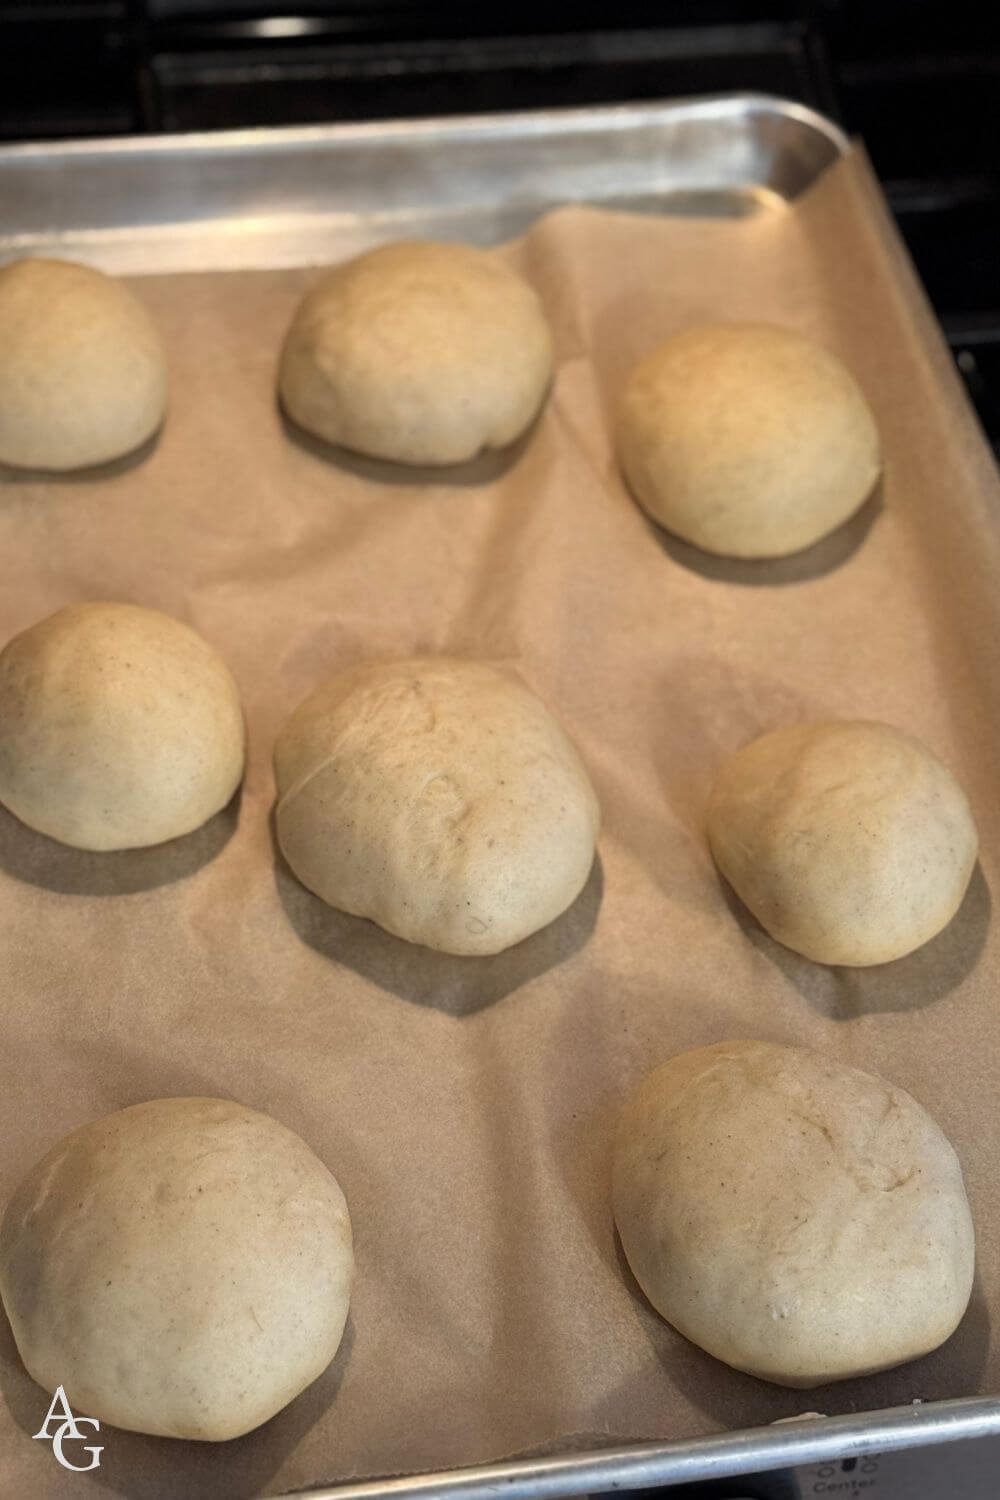
When the dough has risen, punch down the dough and divide into 16 equal pieces. Shape into buns and place on the prepared baking sheets. Cover with clean kitchen towels and let rise for another 45 minutes to 1 hour.
Meanwhile, preheat the oven to 440°F (220°C) and prepare the fillings
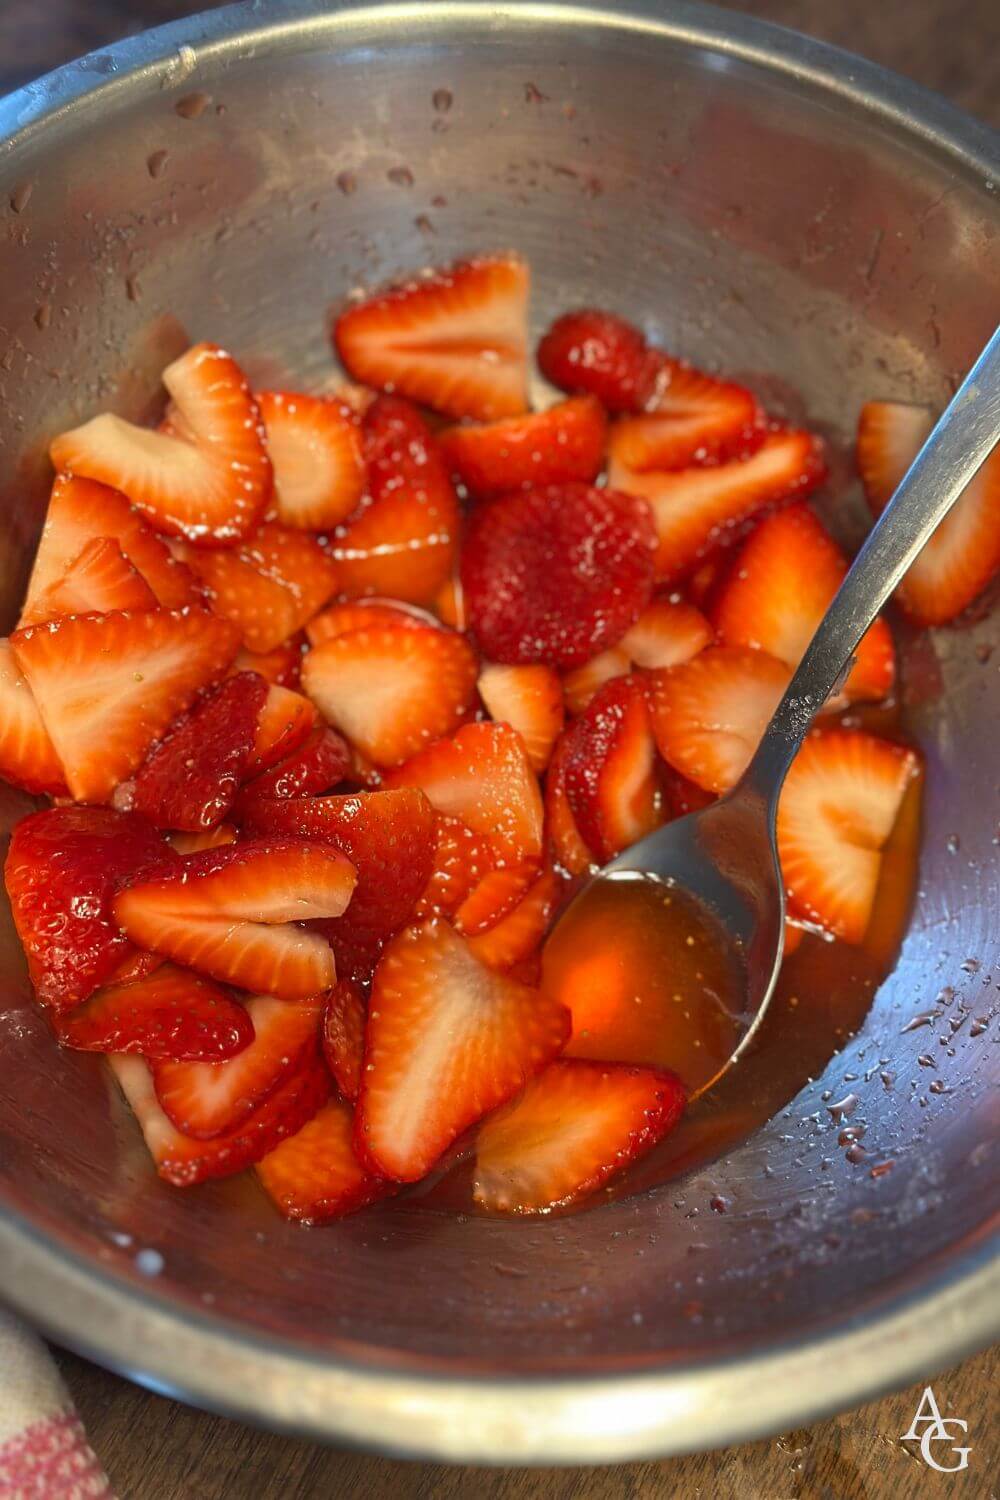
To make the macerated strawberry filling:
Place the sliced strawberries in a medium bowl with the sugar and lemon juice and stir using a spoon until the sugar has dissolved. Let sit for at least 30 minutes to macerate.
Keep chilled until ready to use.
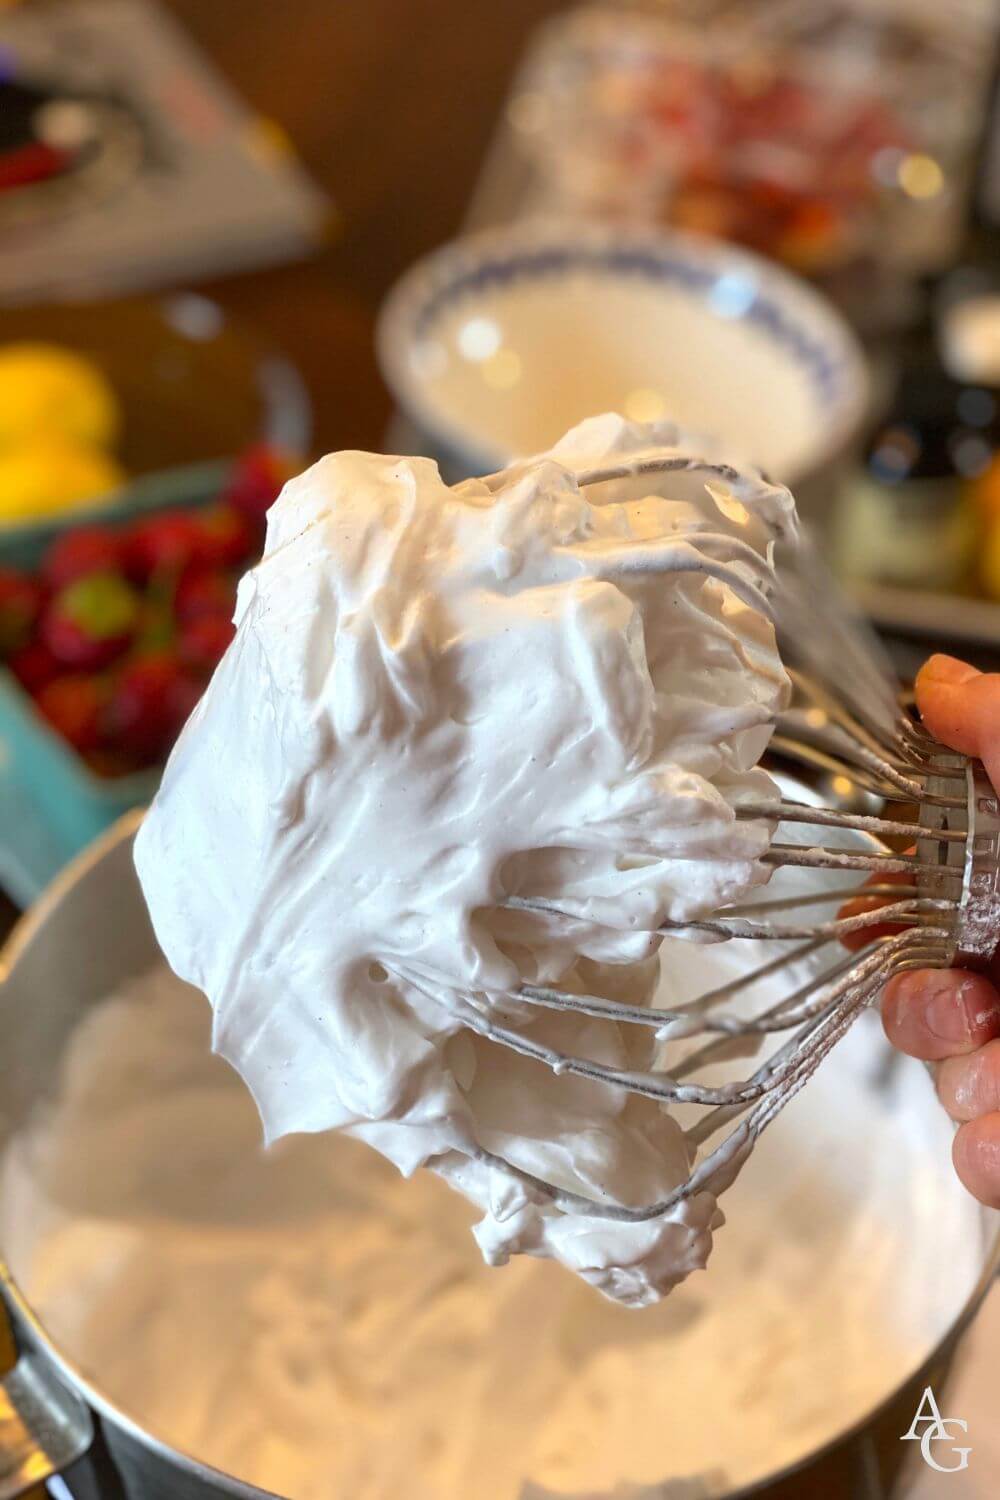
To make the whipped cream:
Add the container of vegan whipping cream, powdered sugar, and vanilla extract into the bowl of a stand mixer fitted with the whisk attachment. Whisk on high for 3-4 minutes or until soft peaks form. Taste and adjust sweetness to your liking.
Keep chilled until ready to use.
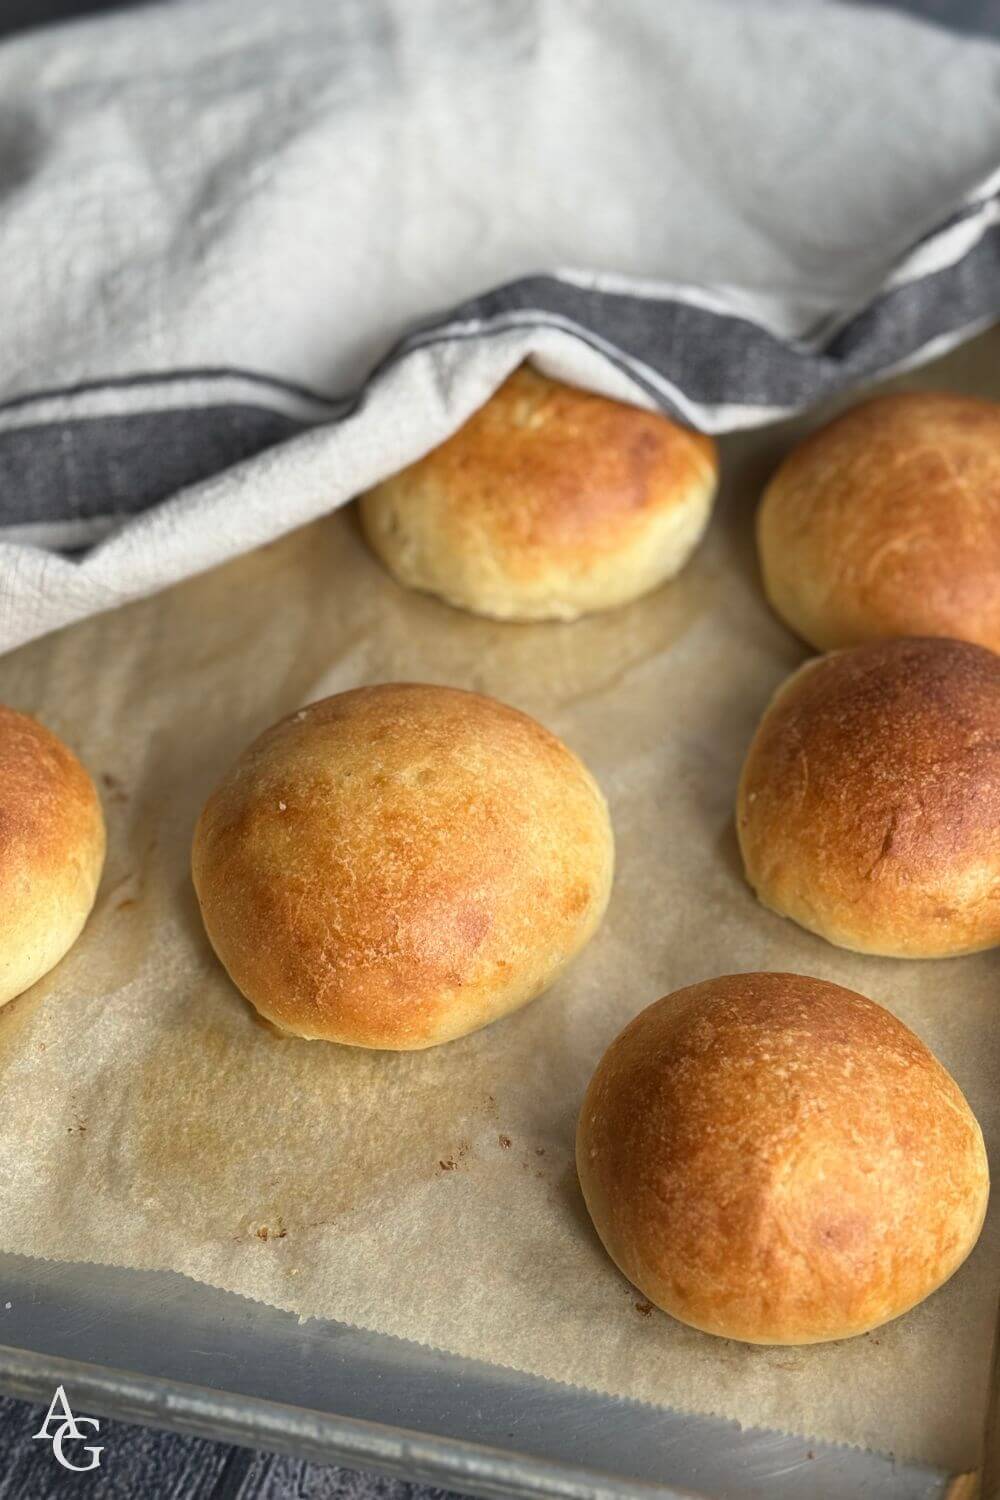
When the second rise is done, brush the top of the buns with non-dairy milk and/or melted butter. Bake on the middle rack for 10-12 minutes until golden on top.
Let cool completely on a rack before assembling.
To assemble the buns:
Using a sharp serrated knife, carefully slice off the top third of each bun, creating a “lid.”
With a small spoon or your fingers, gently hollow out some of the inside of the bun, creating a well for the filling. Be careful not to remove too much or make the walls too thin.
Save the removed bread pieces for another use (they make excellent bread pudding or breadcrumbs).
Spoon 1-2 tablespoons of the macerated strawberries along with some of their juice into each hollowed bun.
Using a pastry bag, pipe generous swirls of whipped cream on the strawberries, or spoon on dollops of whipped cream.
Either place the “lid” gently on top of the cream at an angle or serve it alongside.
Dust the assembled buns with powdered sugar just before serving.
Danish Fastelavnsboller (Danske Fastelavnsboller)
Makes 16 buns
For the buns:
4 cups (600g) all-purpose flour
½ cup (120g) sugar
1 packet (2¼ teaspoons) active dry yeast
1 heaping teaspoon ground cardamom
¼ teaspoon salt
3 tablespoons Just Egg (or 1 flax egg prepared by mixing 1 tablespoon ground flax seeds with 3 tablespoons water)
2 cups (5 dl) non-dairy milk
1 stick (113g) non-dairy butter, chilled and diced
Additional butter and non-dairy milk for brushing the top of the buns
For the pastry cream:
⅓ cup (40g) cornstarch
½ cup (100g) sugar
1 cup (2.4 dl) non-dairy milk
1 cup (2.4 dl) non-dairy cream
1 tablespoon vanilla paste
3½ tablespoons (50g) non-dairy butter, diced
For the whipped cream:
1 cup (2.4 dl) non-dairy heavy cream
2-3 tablespoons powdered sugar
For the chocolate glaze:
1 cup (120g) powdered sugar, sifted
¼ cup (20g) cocoa powder, sifted
2-3 tablespoons non-dairy milk, or as needed
Cake sprinkles for decoration (optional)
Directions
To make the buns:
Add all the ingredients except the butter to the bowl of a stand mixer fitted with the dough hook. Start kneading slowly for 5 minutes, then increase the speed to medium for another 5 minutes.
Add the chilled butter and knead for another 10 minutes until a smooth dough forms.
Cover the bowl with a clean kitchen towel or cling wrap, and let sit in a warm spot to rise until doubled in size, about 2 hours.
While the dough is rising, line two baking sheets with parchment paper and prepare the pastry cream.
To make the pastry cream:
In a medium pot on low-medium heat, whisk together the cornstarch, sugar, milk, and cream.
Continue whisking steadily as the mixture begins to thicken, about 3-4 minutes.
Once thickened, continue whisking for 1 additional minute to ensure the cornstarch is fully cooked.
Remove from heat and stir in the vanilla paste until well combined.
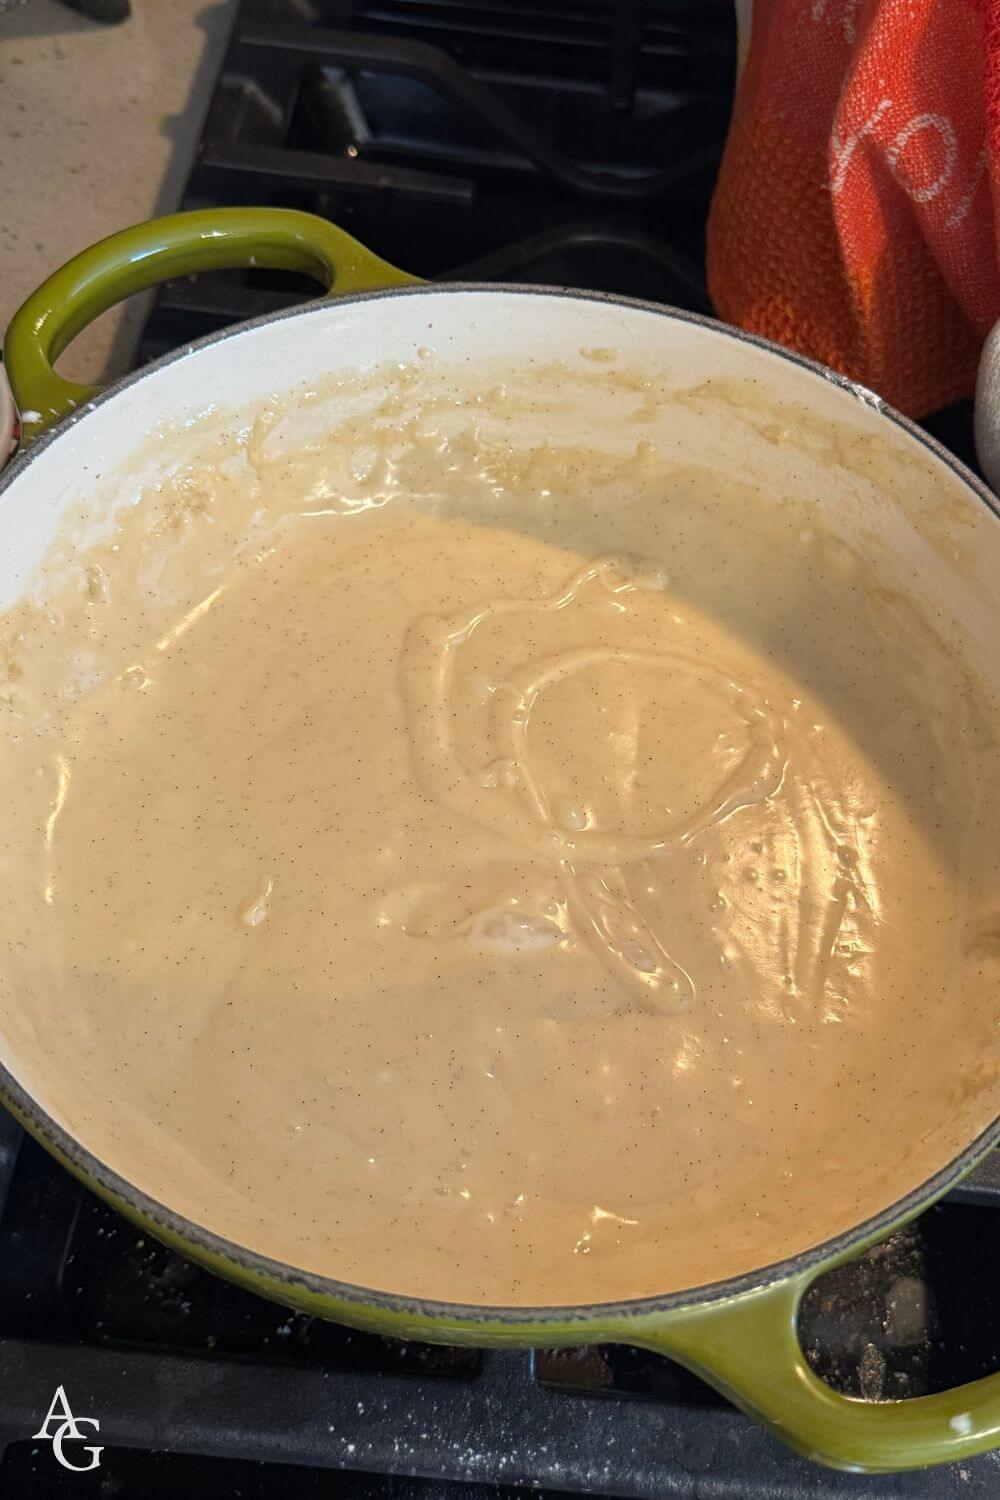
Add the cubed non-dairy butter and whisk until the mixture becomes smooth and glossy.
If any lumps remain, use an immersion blender to smooth the mixture completely.
Transfer to a glass bowl and immediately cover the surface directly with plastic wrap to prevent a skin from forming.
Let cool completely before using. The pastry cream will seize up in the fridge, so before assembling the buns, use an immersion blender to create a smooth cream.
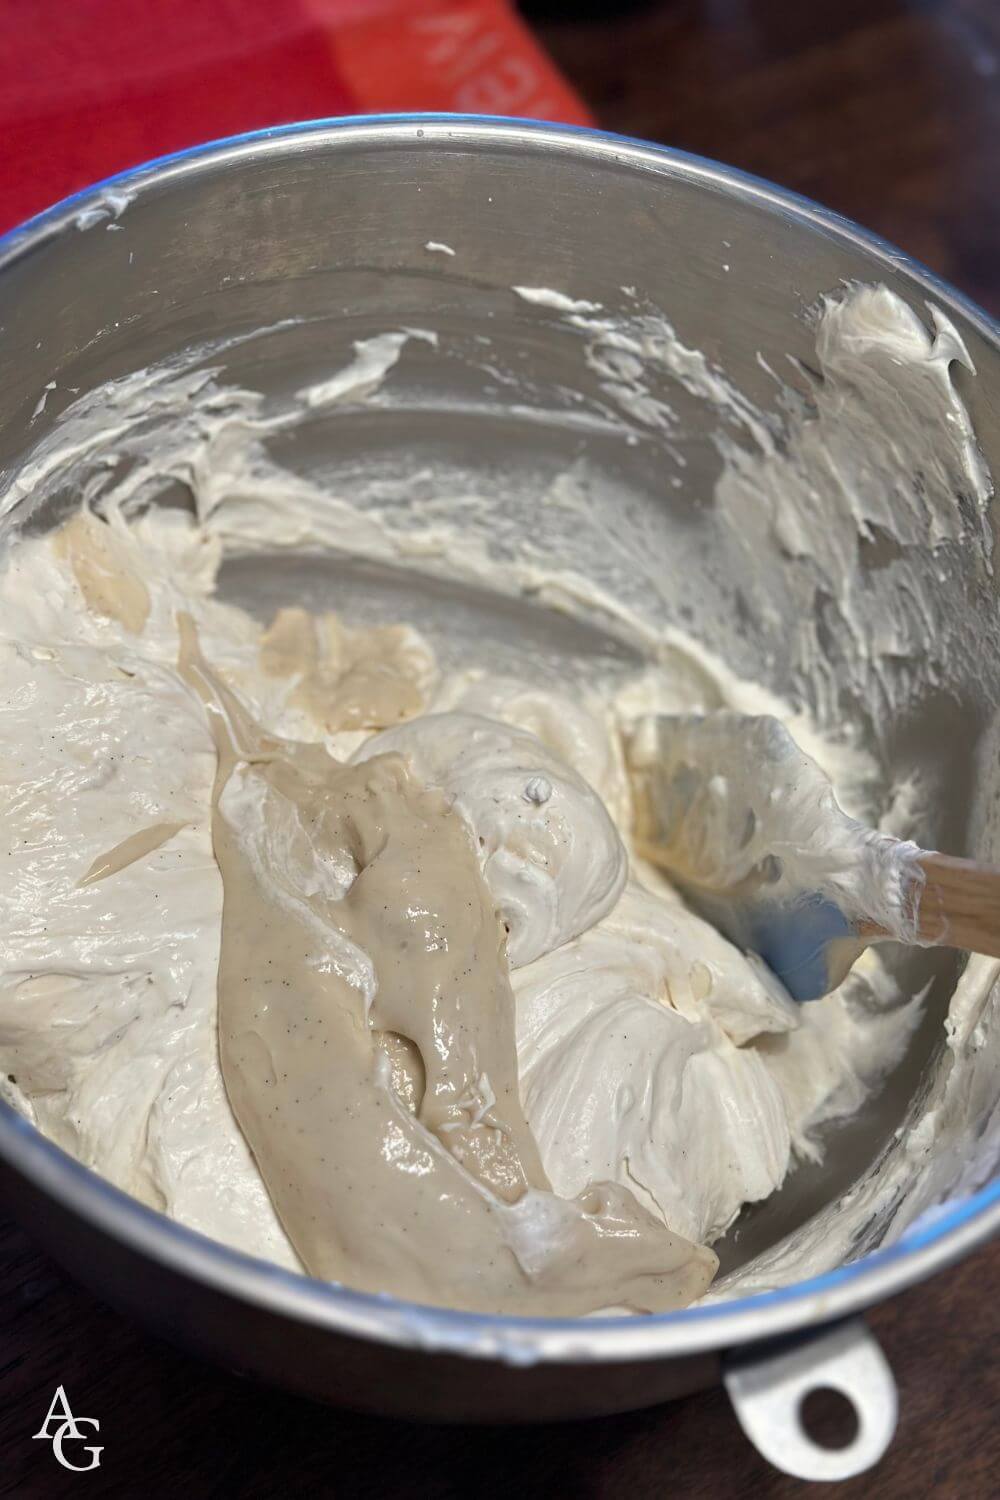
To make the whipped cream:
Add the non-dairy heavy cream and powdered sugar to the bowl of a stand mixer fitted with the whisk attachment. Whisk on high speed until soft peaks form, about 2-3 minutes.
When the pastry cream has chilled, carefully fold the whipped cream into the pastry cream and keep chilled until ready to fill the buns.
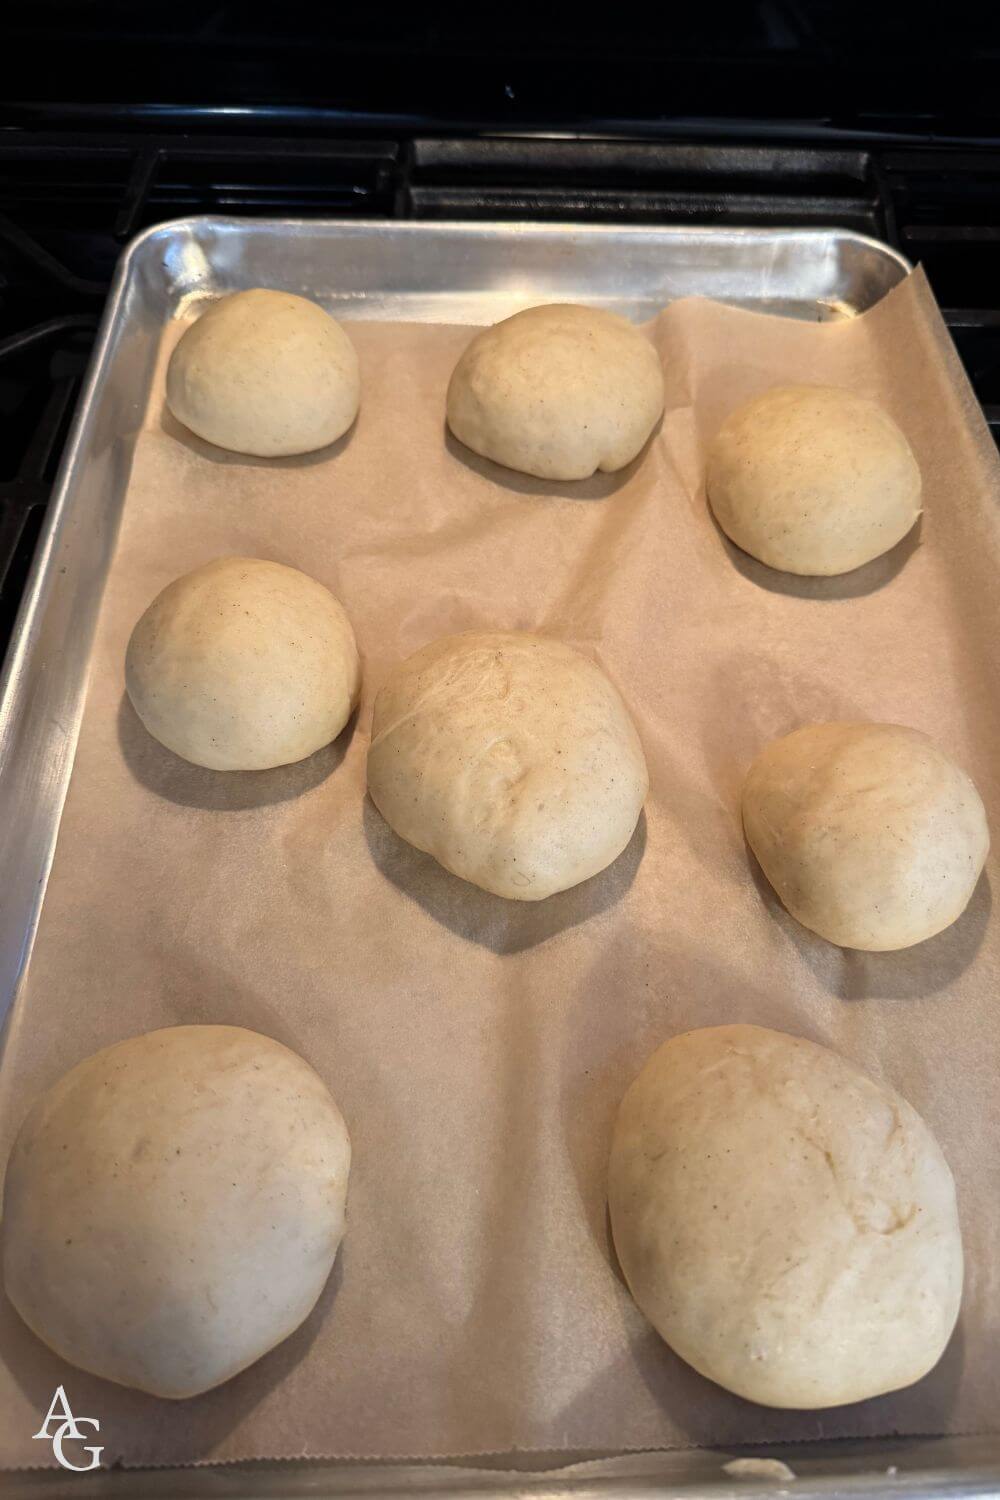
When the dough has risen, punch down the dough and divide into 16 equal pieces. Shape into buns and place on the prepared baking sheets. Cover with clean kitchen towels and let rise for 30 minutes.
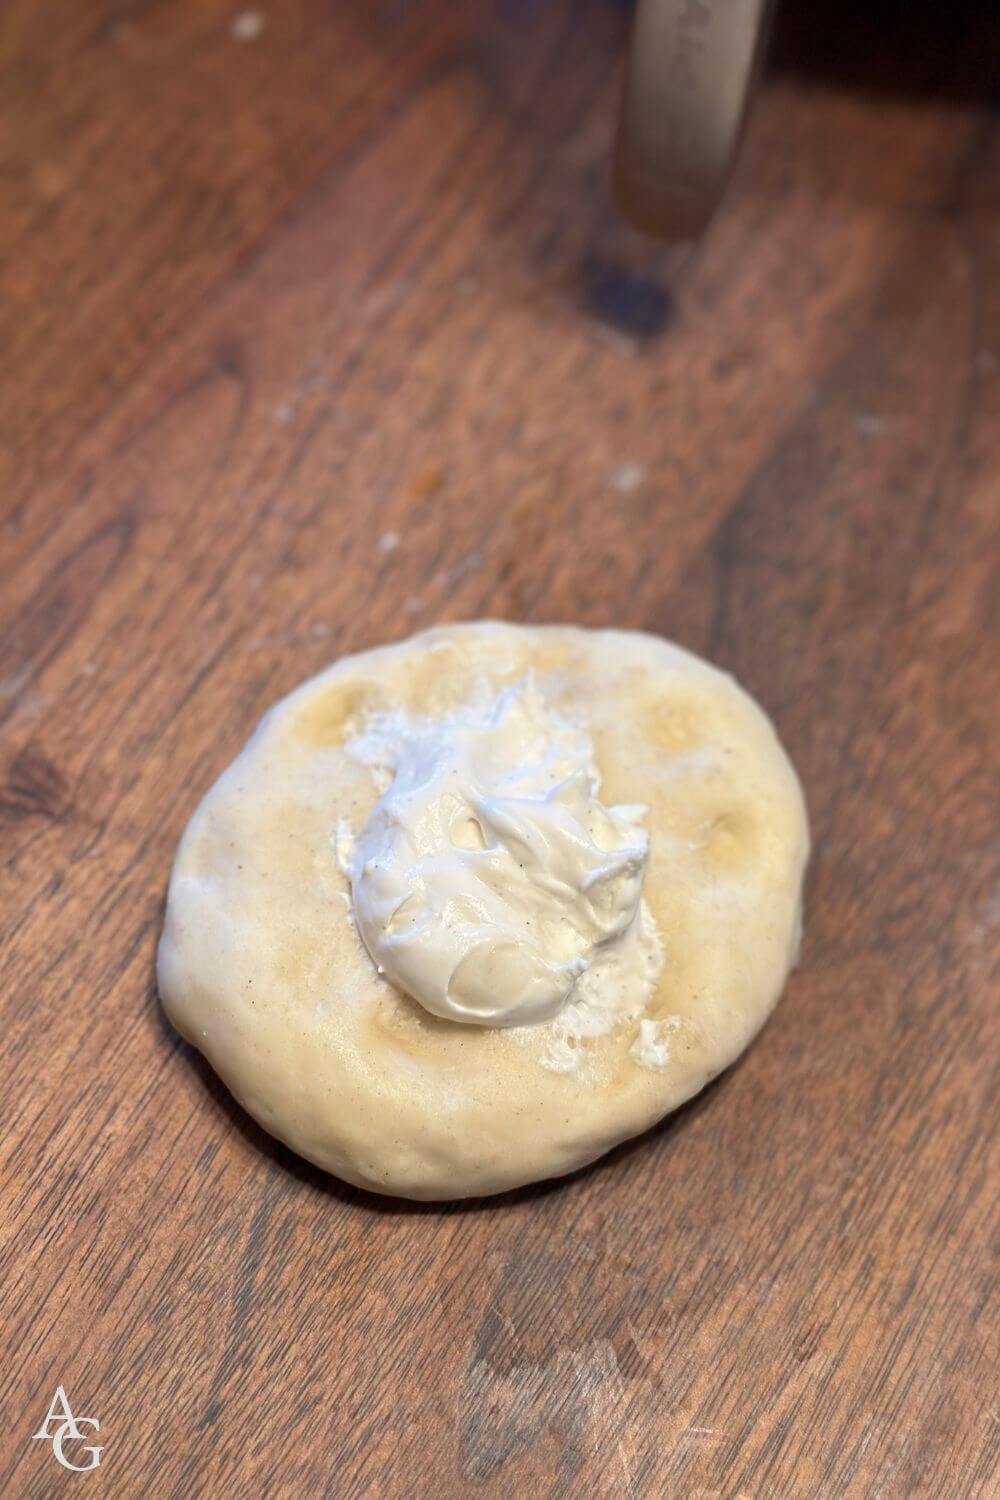
After rising, take one bun at a time, and flatten into a rough 4-inch circle on a lightly floured surface.
Place 1 tablespoon of the chilled pastry cream in the center of the circle, making sure not to add too much, or the buns will burst in the oven.

Carefully fold the edges of the dough over the filling, pinching firmly to seal completely. Ensure there are no openings where filling could leak out during baking.
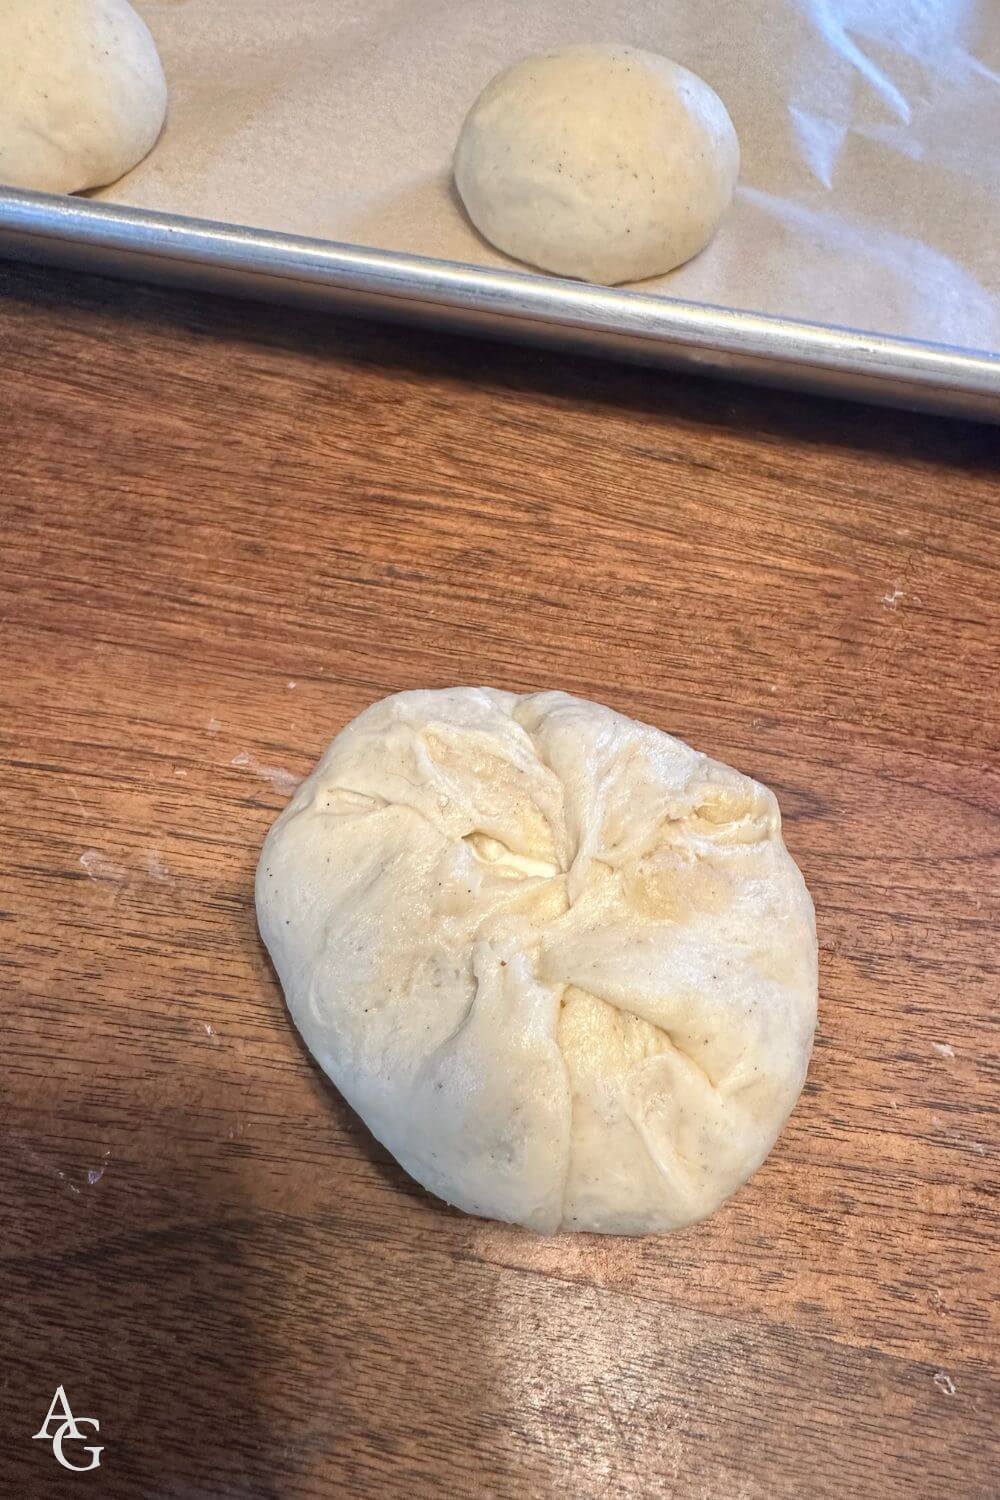
Return the filled bun seam-side down to the baking sheet, gently shaping it back into a round.
Repeat with remaining dough portions, spacing buns about 2 inches apart.
Cover loosely with a clean kitchen towel and let rise again for 30 minutes, until puffy but not quite doubled.
While the buns are rising, preheat the oven to 440°F (220°C) and make the chocolate glaze.
To make the chocolate glaze:
Sift the powdered sugar and cocoa powder into a small bowl and whisk to combine.
Add the non-dairy milk 1 tablespoon at a time, whisk until smooth and the glaze is thick but pourable.
Set aside until ready to use.
To bake the buns:
Bake one sheet at a time on the middle rack for about 12 minutes until golden on top.
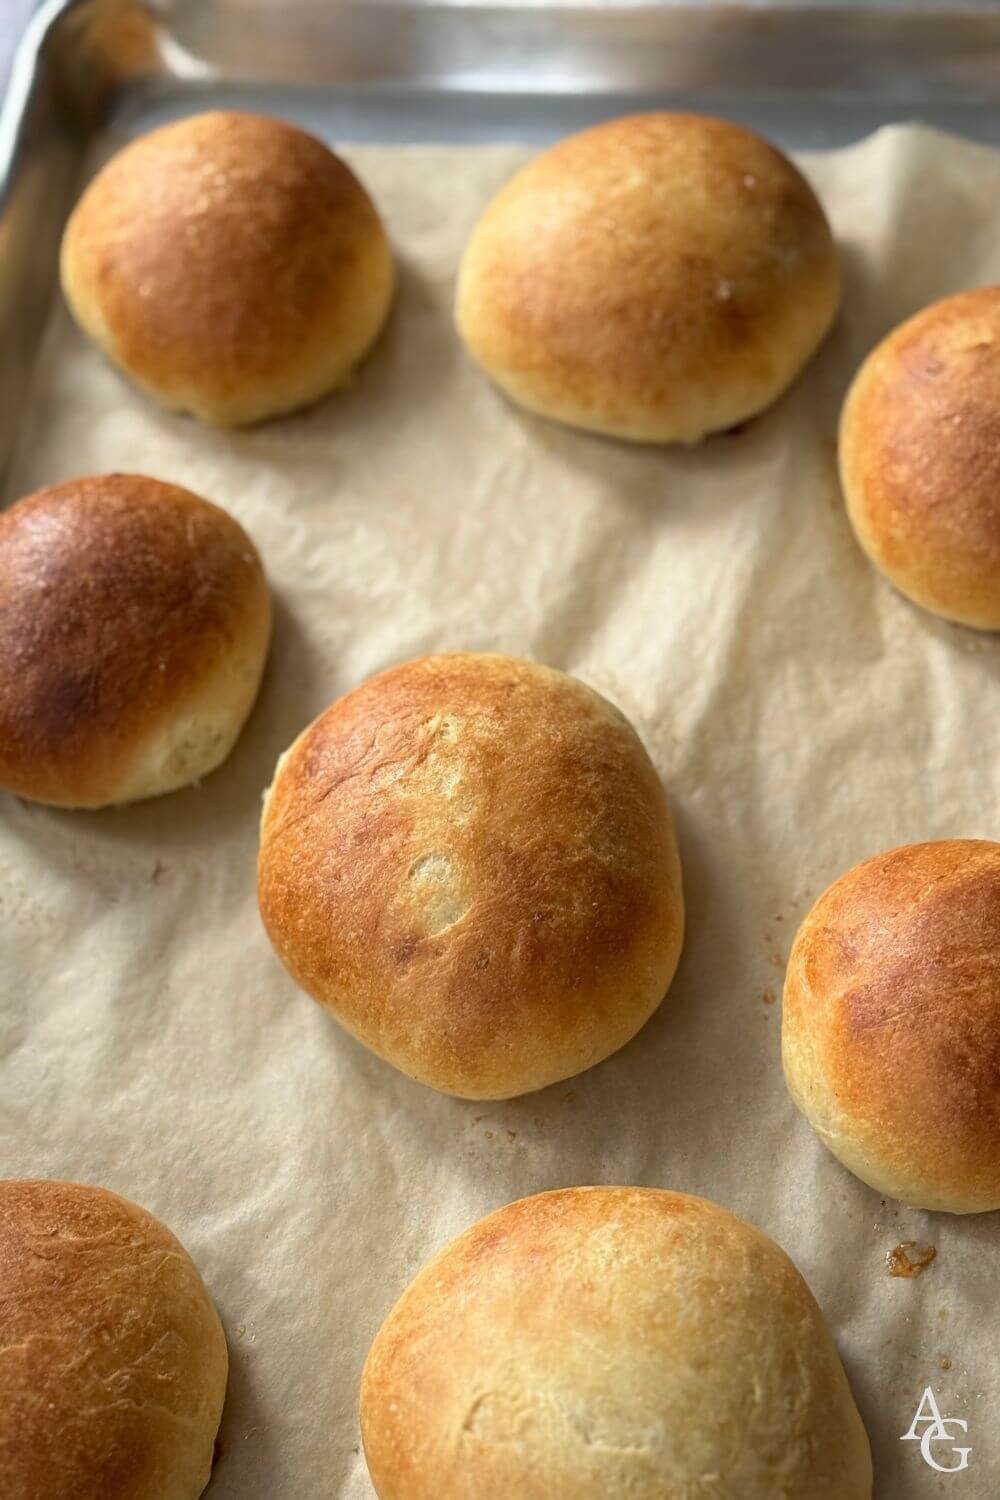
Let cool on a wire rack for about 30 minutes until lightly warm, then drizzle the top of each bun generously with the chocolate glaze and top with sprinkles, if using.
Let glaze set for about 15 minutes before serving.
Notes
These buns are best enjoyed the day they’re made but will keep in an airtight container for up to 2 days.

More Recipes To Try…
Norwegian Fastelavnsboller (Norske Fastelavnsboller)
Ingredients
For the buns:
- 4 cups (600g) all-purpose flour
- ½ cup (120g) sugar
- 1 packet (2¼ teaspoons) active dry yeast
- 1 heaping teaspoon ground cardamom
- ¼ teaspoon salt
- 3 tablespoons Just Egg (or 1 flax egg prepared by mixing 1 tablespoon ground flax seeds with 3 tablespoons water)
- 2 cups (5 dl) non-dairy milk
- 1 stick (113g) vegan butter, chilled and diced
- Additional butter and non-dairy milk for brushing the top of the buns
For the macerated strawberry filling:
- 1 lb (450g) strawberries, cleaned, hulled, and sliced
- ⅓ cups (70g) sugar
- Juice from ½ lemon
For the whipped cream:
- 1 16.9 oz container (500 mL) vegan whipping cream like Country Crock, Violife, or Califa
- 3-4 tablespoons powdered sugar, or to taste
- 1 teaspoon vanilla extract or paste
- Additional powdered sugar for decoration
Instructions
To make the buns:
- Line two baking sheets with parchment paper and set aside.
- Add all the ingredients except the butter to the bowl of a stand mixer fitted with the dough hook. Start kneading slowly for 5 minutes, then increase the speed to medium for another 5 minutes.
- Add the chilled butter and knead for another 10 minutes until a smooth dough forms.
- Cover the bowl with a clean kitchen towel or cling wrap, and let sit in a warm spot to rise until doubled in size, about 2 hours.
- When the dough has risen, punch down the dough and divide into 16 equal pieces. Shape into buns and place on the prepared baking sheets. Cover with clean kitchen towels and let rise for another 45 minutes to 1 hour.
- Meanwhile, preheat the oven to 440°F (220°C) and prepare the fillings
To make the macerated strawberry filling:
- Place the sliced strawberries in a medium bowl with the sugar and lemon juice and stir using a spoon until the sugar has dissolved. Let sit for at least 30 minutes to macerate.
- Keep chilled until ready to use.
To make the whipped cream:
- Add the container of vegan whipping cream, powdered sugar, and vanilla extract into the bowl of a stand mixer fitted with the whisk attachment. Whisk on high for 3-4 minutes or until soft peaks form. Taste and adjust sweetness to your liking.
- Keep chilled until ready to use.
- When the second rise is done, brush the top of the buns with non-dairy milk and/or melted butter. Bake on the middle rack for 10-12 minutes until golden on top.
- Let cool completely on a rack before assembling.
To assemble the buns:
- Using a sharp serrated knife, carefully slice off the top third of each bun, creating a “lid.”
- With a small spoon or your fingers, gently hollow out some of the inside of the bun, creating a well for the filling. Be careful not to remove too much or make the walls too thin.
- Save the removed bread pieces for another use (they make excellent bread pudding or breadcrumbs).
- Spoon 1-2 tablespoons of the macerated strawberries along with some of their juice into each hollowed bun.
- Using a pastry bag, pipe generous swirls of whipped cream on the strawberries, or spoon on dollops of whipped cream.
- Either place the “lid” gently on top of the cream at an angle or serve it alongside.
- Dust the assembled buns with powdered sugar just before serving.
Danish Fastelavnsboller (Danske Fastelavnsboller)
Ingredients
For the buns:
- 4 cups (600g) all-purpose flour
- ½ cup (120g) sugar
- 1 packet (2¼ teaspoons) active dry yeast
- 1 heaping teaspoon ground cardamom
- ¼ teaspoon salt
- 3 tablespoons Just Egg (or 1 flax egg prepared by mixing 1 tablespoon ground flax seeds with 3 tablespoons water)
- 2 cups (5 dl) non-dairy milk
- 1 stick (113g) non-dairy butter, chilled and diced
- Additional butter and non-dairy milk for brushing the top of the buns
For the pastry cream:
- ⅓ cup (40g) cornstarch
- ½ cup (100g) sugar
- 1 cup (2.4 dl) non-dairy milk
- 1 cup (2.4 dl) non-dairy cream
- 1 tablespoon vanilla paste
- 3½ tablespoons (50g) non-dairy butter, diced
For the whipped cream:
- 1 cup (2.4 dl) non-dairy heavy cream
- 2-3 tablespoons powdered sugar
For the chocolate glaze:
- 1 cup (120g) powdered sugar, sifted
- ¼ cup (20g) cocoa powder, sifted
- 2-3 tablespoons non-dairy milk, or as needed
- Cake sprinkles for decoration (optional)
Instructions
To make the buns:
- Add all the ingredients except the butter to the bowl of a stand mixer fitted with the dough hook. Start kneading slowly for 5 minutes, then increase the speed to medium for another 5 minutes.
- Add the chilled butter and knead for another 10 minutes until a smooth dough forms.
- Cover the bowl with a clean kitchen towel or cling wrap, and let sit in a warm spot to rise until doubled in size, about 2 hours.
- While the dough is rising, line two baking sheets with parchment paper and prepare the pastry cream.
To make the pastry cream:
- In a medium pot on low-medium heat, whisk together the cornstarch, sugar, milk, and cream.
- Continue whisking steadily as the mixture begins to thicken, about 3-4 minutes.
- Once thickened, continue whisking for 1 additional minute to ensure the cornstarch is fully cooked.
- Remove from heat and stir in the vanilla paste until well combined.
- Add the cubed non-dairy butter and whisk until the mixture becomes smooth and glossy.
- If any lumps remain, use an immersion blender to smooth the mixture completely.
- Transfer to a glass bowl and immediately cover the surface directly with plastic wrap to prevent a skin from forming.
- Let cool completely before using. The pastry cream will seize up in the fridge, so before assembling the buns, use an immersion blender to create a smooth cream.
To make the whipped cream:
- Add the non-dairy heavy cream and powdered sugar to the bowl of a stand mixer fitted with the whisk attachment. Whisk on high speed until soft peaks form, about 2-3 minutes.
- When the pastry cream has chilled, carefully fold the whipped cream into the pastry cream and keep chilled until ready to fill the buns.
- When the dough has risen, punch down the dough and divide into 16 equal pieces. Shape into buns and place on the prepared baking sheets. Cover with clean kitchen towels and let rise for 30 minutes.
- After rising, take one bun at a time, and flatten into a rough 4-inch circle on a lightly floured surface.
- Place 1 tablespoon of the chilled pastry cream in the center of the circle, making sure not to add too much, or the buns will burst in the oven.
- Carefully fold the edges of the dough over the filling, pinching firmly to seal completely. Ensure there are no openings where filling could leak out during baking.
- Return the filled bun seam-side down to the baking sheet, gently shaping it back into a round.
- Repeat with remaining dough portions, spacing buns about 2 inches apart.
- Cover loosely with a clean kitchen towel and let rise again for 30 minutes, until puffy but not quite doubled.
- While the buns are rising, preheat the oven to 440°F (220°C) and make the chocolate glaze.
To make the chocolate glaze:
- Sift the powdered sugar and cocoa powder into a small bowl and whisk to combine.
- Add the non-dairy milk 1 tablespoon at a time, whisk until smooth and the glaze is thick but pourable.
- Set aside until ready to use.
To bake the buns:
- Bake one sheet at a time on the middle rack for about 12 minutes until golden on top.
- Let cool on a wire rack for about 30 minutes until lightly warm, then drizzle the top of each bun generously with the chocolate glaze and top with sprinkles, if using.
- Let glaze set for about 15 minutes before serving.


Cardamom! They sound and look delicious!