I will admit I’m not a huge cake eater, which is why I don’t have loads of cake recipes on my blog, and if I do, they are super simple and in a more simple and ‘rustic’ style.
The exception is the 17th of May of course when no koldtbord (or as the Swedes say, ‘smorgasbord) is complete without at least one decadent cake.

The 17th of May is perhaps the biggest celebratory day in Norway. This day is the national day of Norway, or the Constitution Day when all Norwegians walk in parades, wear their traditional bunad garment, eat lots of ice cream and hot dogs, and just are feeling grateful for our country and to be Norwegian.
It is such a special feeling to be in Norway during this time and to witness the solidarity and pride of all my countrymen, which makes me sad I’m not there this year. Because of the current pandemic, we had to cancel our trip indefinitely.
My sister shared photos of it snowing today, so perhaps I should be grateful to still be in NY where it’s 80 degrees and sunny? No, the truth is I would rather be with my family on the 17th of May but I tried my best to recreate the atmosphere with the cake I’m writing about today.
When I turned vegan 7 years ago, I thought I would have to say goodbye to cream cakes, or bløtkake, as we call it in Norwegian, forever. While I may not be the first one to run to a cake table, I enjoy making them, so I was stoked to find out that I could make whipped cream out of something so simple and unusual as a can of coconut cream and another of chickpeas!
Vegans are so creative!
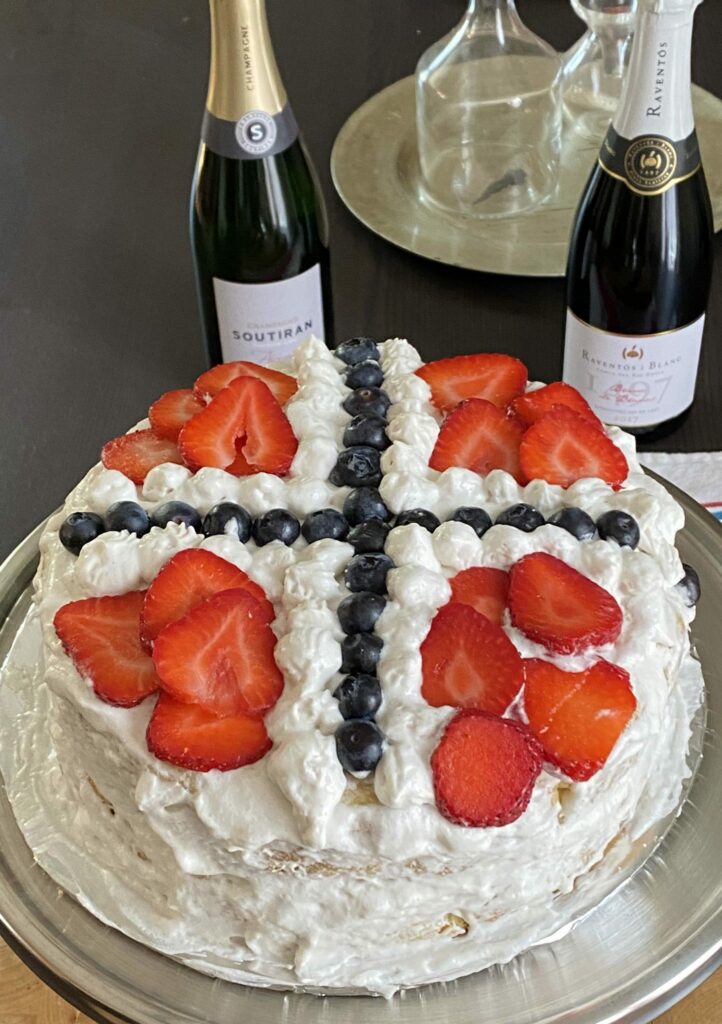
Cream cakes come in all shapes, sizes, and flavors in Norway, but we love our fruit and berries. Luckily we have berries in the colors of the Norwegian flag, and there are so many gorgeous versions of flag cakes out there by avid professional and amateur bakers alike.
My goal is not to compete on a visual level, because my cake decorating skills are still being improved upon (but just wait!). But when it comes to flavor and texture, I believe I can stand up to the best, even non-vegan cake bakers!
Baking a vanilla cake might sound simple, but when it comes to making it vegan, I found I had to perform several tries before I was happy with the outcome.
Since I’m not using eggs, some of them became heavy and gummy, one of them even split in the middle because apparently I used too much leavening (baking powder/soda). Another just didn’t taste like vanilla at all, and that to me is vital when it comes to bløtkake.
Sure, it’s wonderful to create an amazing masterpiece that is impressive to look at, but what’s the point if it’s flavorless and tastes like crap?
So the testing continued, and today I can finally say I made one of the most flavorful, fantastic cakes I’ve ever baked! And I had to quickly share it with you in the hopes there might be time for you to prepare it in time for Norway’s Constitution Day on Sunday.
Additionally, I decided to make whipped cream by combining two of the different methods that vegans currently use most frequently.
One is to use aquafaba or the liquid in canned chickpeas. Yes, it sounds strange, but the protein binds up just like egg whites and when whisking it turns into the most awesome whipped cream! You can also use it to make meringue or pavlova, another favorite cake among Norwegians on May 17th.
Second is to use a can of chilled, full-fat coconut cream (only the solid part will whip up so make sure to not add in the liquid). I enjoy the thickness of this because the whipped aqufaba is more light (think egg whites), but the key is to add in a good amount of confectioner’s sugar, which will help thicken it and hold it together.
If you don’t care for the coconut flavor, you can omit whipping the coconut cream and just use the aquafaba. Totally up to you!
To help you avoid having to bake several cakes to get a tasty one as I did, let me share with you…
Some key points to keep in mind before baking
- Don’t overwork the batter, barely fold it together to mix in the flour. Otherwise, the cake won’t get as light and delicate.
- Resist the temptation to open the oven to check on your cake before the 30 minutes are over. If you don’t resist your cake might sink and collapse in the middle. If you have an oven light, turn it on so you can view it from the outside.
- If you have an oven thermometer this is great too, as most ovens vary in temperature. You want to make sure your oven is actually set at 350° Fahrenheit (180° Celcius).
- Make sure to completely cool, then chill the cakes in the fridge before decorating. Adding whipped cream to even slightly warm cakes… well—the cream will melt and you’ll have a mess on your hand.
- Do not use light canned coconut milk – full fat is a must, the higher the fat content the better (14 grams is good).
- Don’t rush the whipping of the aquafaba. For it to stay together and be workable whipping it for 9 to 10 minutes is a must. And yes, up to a cup of confectioners’ sugar is right to add, in order to make it taste sweet and to thicken up and hold the shape of whipped cream. Choose low-sodium cans of chickpeas as we don’t want salty whipped cream 🙂
Now you’re ready—happy baking and please tag me on IG @arcticgrub if you decide to bake the cake!
Happy May 17th or as we say in Norway:
Gratulerer med dagen!
Norwegian Flag Cake for May 17th
Makes 2 x 9-inch cakes
For sponge cakes:
3 ½ cups (440 grams) all-purpose flour
2 cups (400 grams) granulated sugar
2 tsp baking soda
1 tsp baking powder
1 tsp salt
2 cups (480 ml) soy or oat milk
¾ cups (177 ml) neutral oil like canola or safflower
1 tbsp vanilla extract
2 tbsp white or apple cider vinegar
For whipped cream (2-parts):
2 x 15 oz cans low-sodium chickpeas, liquid only (reserve chickpeas for later use), chilled
½ tsp cream of tartar
2 tsp vanilla extract or vanilla sugar
¾-1 cup (125 g) organic confectioners’ sugar
1 x 15 oz can full-fat organic coconut milk, chilled overnight in the fridge
4-5 tbsp confectioners’ sugar
2 tsp vanilla extract or vanilla sugar
1 cup blueberries for decorating
2 cups strawberries, sliced for decorating
Preheat oven to 350° Fahrenheit (180° Celsius). Grease and line two 9-inch baking pans with parchment paper and set aside. Place a small to medium-sized bowl in the fridge (for coconut whipped cream).
Sift the flour into a mixing bowl, then add the sugar, baking soda, baking powder, and salt and combine well.
In a separate bowl, whisk together the non-dairy milk, oil, vanilla extract, and vinegar and add into the flour mixture. Gently combine until just combined—make sure you don’t overmix, this will make the cake tough!
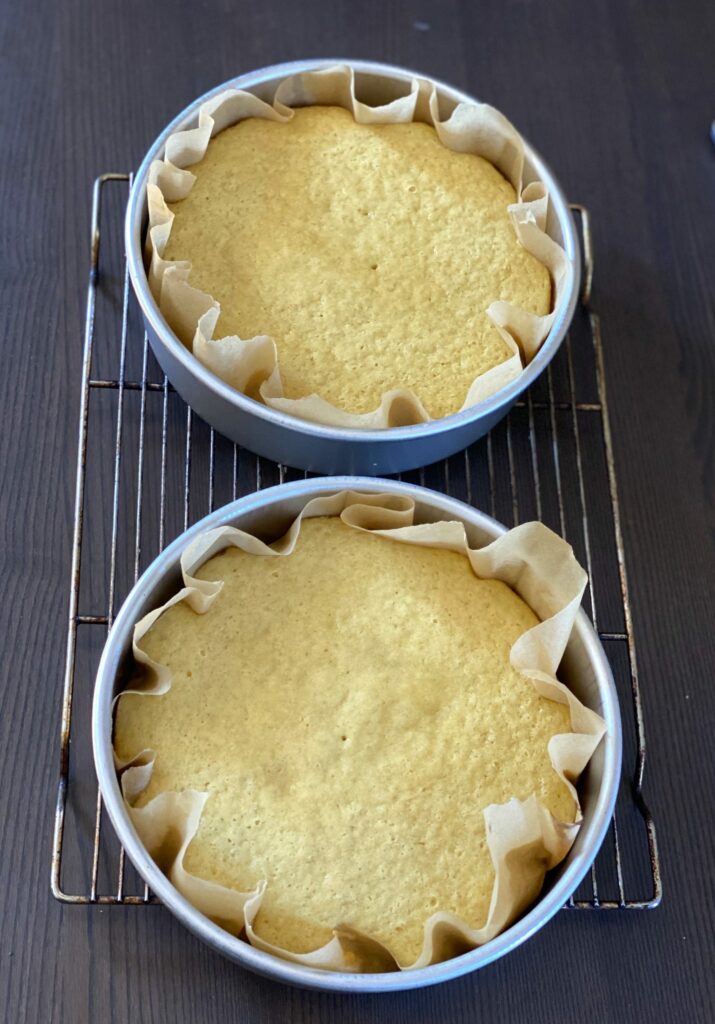
Pour the batter evenly into the two prepared cake pans and bake in the oven for about 30 minutes, until a cake tester or toothpick inserted comes out clean.
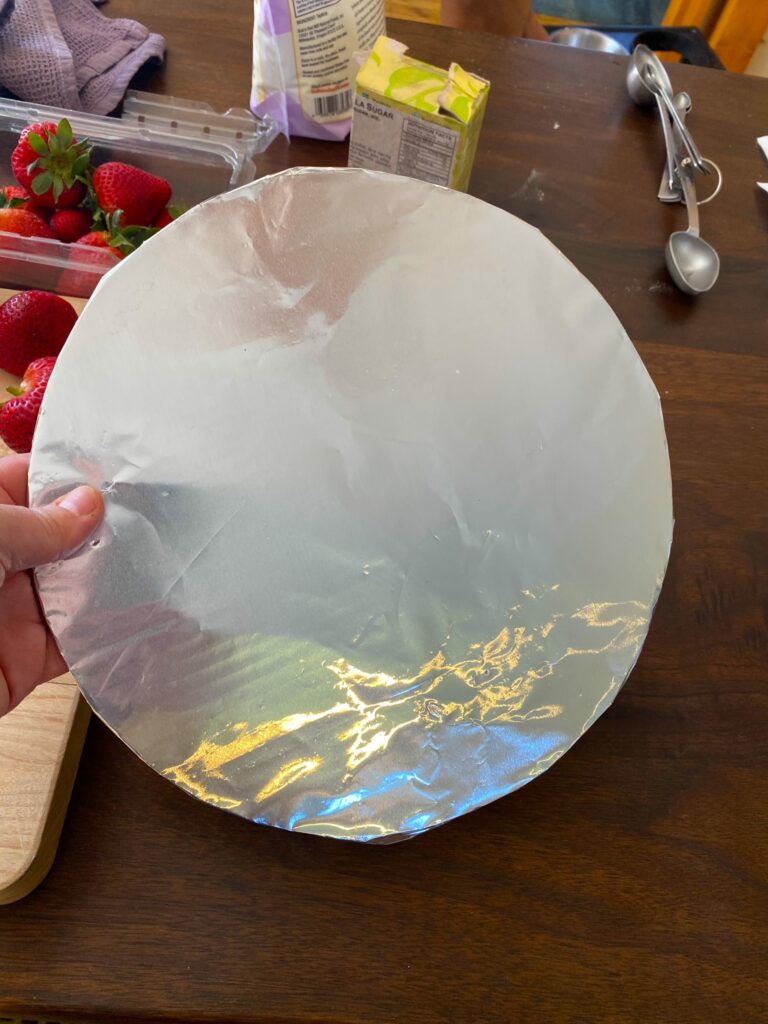
Let cakes cool completely on a rack, then transfer them carefully out of the cake pans and place on a cake circle, sheet pan or plate, and place in the fridge while you make the whipped cream and prepare the berries.
The cakes need to be completely chilled before you start decorating.
Start preparing the whipped cream:
Remove the canned coconut milk from the fridge, and carefully open it, the top part will be solid. Carefully remove the solid cream with a spoon, saving the coconut liquid for a later time (it’s great in smoothies!).
Place the solid coconut cream in the chilled bowl of a stand mixer, fit the whisk attachment on and start whipping, then add in the confectioner’s sugar and vanilla extract. Whisk for about 2 minutes or so until a cream forms. Place in the pre-chilled cold bowl and return to the fridge while you start on the canned chickpea liquid part of the cream.
Clean out the bowl you whipped the coconut cream in (make sure it’s not warm, but cool to the touch before adding the liquid). Add the canned chickpea liquid (also known as aquafaba) to a chilled bowl of a stand mixer, fit it with the whisk and start whisking on high speed for about 1-2 minutes, then add the cream of tartar, continue whisking for another 5 minutes.
Finally, add the confectioner’s sugar gradually and then the vanilla extract and whisk for another 2 minutes. In total, you should whip the liquid for about 9-10 minutes (yes I know it sounds like a lot but this way you get a thick, solid cream).
Bring out the prepared whipped coconut cream and carefully fold it into about half of the aquafaba (there will be leftover cream), using a spatula. Place some of the cream in a piping bag fitted with a star tip and place in the fridge while you cover the cake with the remaining cream.
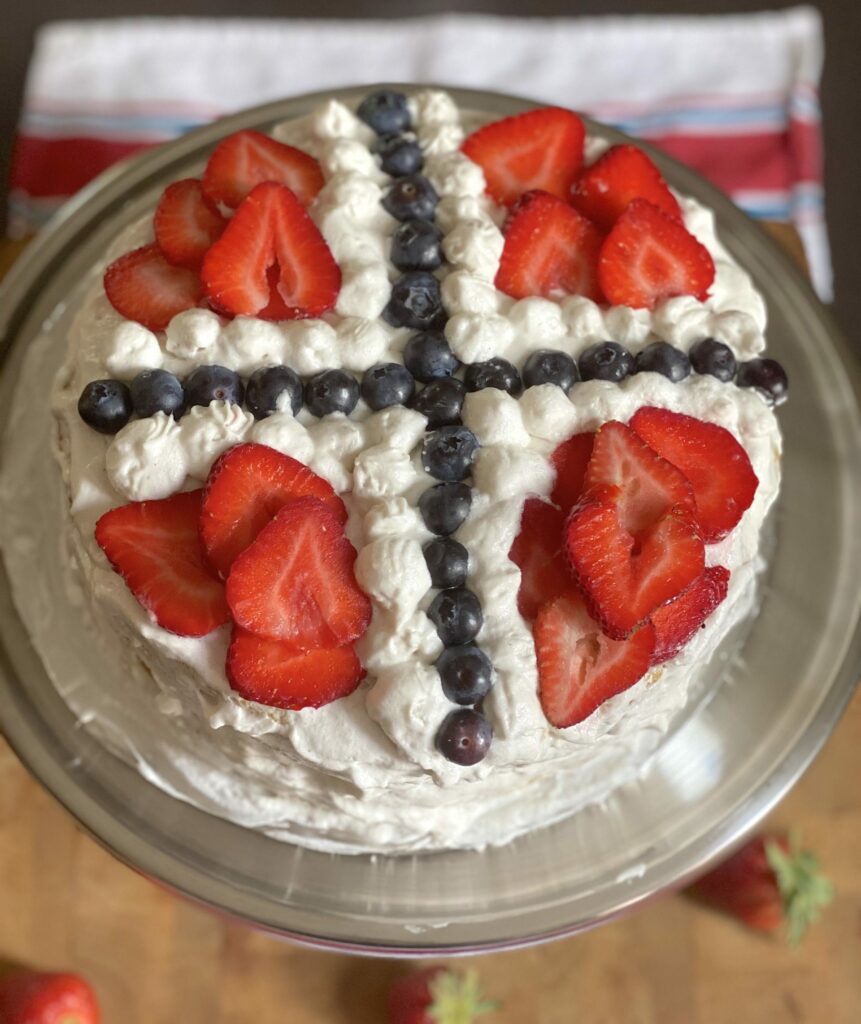
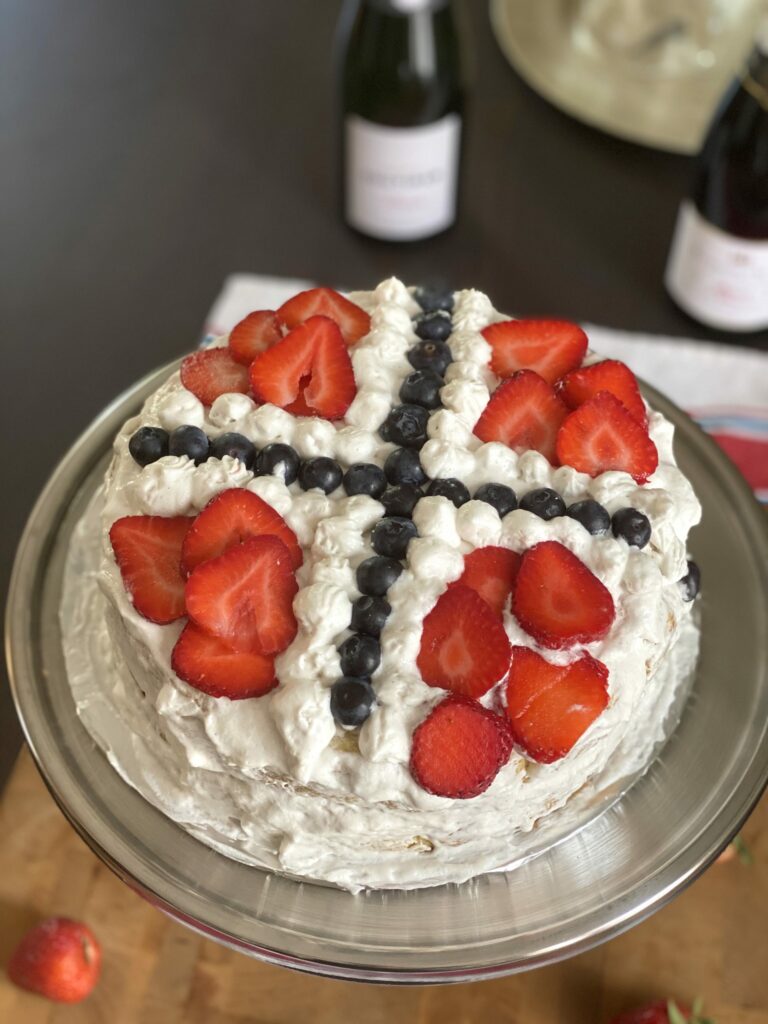
Start by filling the cake and spread some cream on the first layer cake, and add a few strawberries on top, then place the second cake layer carefully on top, then coat the entire cake with whipped cream. Smooth the top, then start decorating the cake in the shape of the Norwegian flag, starting with the blueberries, making a cross, then piping little ‘dots’ along the edges of the blueberries. Then decorate with the sliced strawberries to make four squares.
And voila—you’ve got a May 17th cake!
Note: the cream will soften up pretty quickly so make sure you are in a cool room while decorating and keep it in the fridge afterward.

Norwegian Flag Cake for May 17th
Ingredients
For sponge cakes:
- 3 ½ cups (440 grams) all-purpose flour
- 2 cups (400 grams) granulated sugar
- 2 tsp baking soda
- 1 tsp baking powder
- 1 tsp salt
- 2 cups (480 ml) soy or oat milk
- ¾ cups (177 ml) neutral oil like canola or safflower
- 1 tbsp vanilla extract
- 2 tbsp white or apple cider vinegar
For whipped cream (2-parts):
- 2 x 15 oz cans low-sodium chickpeas liquid only (reserve chickpeas for later use), chilled
- ½ tsp cream of tartar
- 2 tsp vanilla extract or vanilla sugar
- ¾-1 cup (125 g) organic confectioners' sugar
- 1 x 15 oz can full-fat organic coconut milk chilled overnight in the fridge
- 4-5 tbsp confectioners’ sugar
- 2 tsp vanilla extract or vanilla sugar
- 1 cup blueberries for decorating
- 2 cups strawberries sliced for decorating
Instructions
- Preheat oven to 350° Fahrenheit (180° Celsius). Grease and line two 9-inch baking pans with parchment paper and set aside. Place a small to medium-sized bowl in the fridge (for coconut whipped cream).
- Sift the flour into a mixing bowl, then add the sugar, baking soda, baking powder, and salt and combine well.
- In a separate bowl, whisk together the non-dairy milk, oil, vanilla extract, and vinegar and add into the flour mixture. Gently combine until just combined—make sure you don’t overmix, this will make the cake tough!
- Pour the batter evenly into the two prepared cake pans and bake in the oven for about 30 minutes, until a cake tester or toothpick inserted comes out clean.
- Let cakes cool completely on a rack, then transfer them carefully out of the cake pans and place on a cake circle, sheet pan or plate, and place in the fridge while you make the whipped cream and prepare the berries. The cakes need to be completely chilled before you start decorating.
Start preparing the whipped cream:
- Remove the canned coconut milk from the fridge, carefully open it, the top part will be solid. Carefully remove the solid cream with a spoon, saving the coconut liquid for a later time (it’s great in smoothies!).
- Place the solid coconut cream in the chilled bowl of a stand mixer, fit the whisk attachment on and start whipping, then add in the confectioner’s sugar and vanilla extract. Whisk for about 2 minutes or so until a cream forms. Place in the pre-chilled cold bowl and return to the fridge while you start on the canned chickpea liquid part of the cream.
- Clean out the bowl you whipped the coconut cream in (make sure it’s not warm, but cool to the touch before adding the liquid). Add the canned chickpea liquid (also known as aquafaba) in a chilled bowl of a stand mixer, fit it with the whisk and start whisking on high speed for about 1-2 minutes, then add the cream of tartar, continue whisking for another 5 minutes.
- Finally, add the confectioner’s sugar gradually and then the vanilla extract and whisk for another 2 minutes. In total, you should whip the liquid for about 9-10 minutes (yes I know it sounds like a lot but this way you get a thick, solid cream).
- Bring out the prepared whipped coconut cream and carefully fold it into about half of the aquafaba (there will be leftover cream), using a spatula. Place some of the cream in a piping bag fitted with a star tip and place in the fridge while you cover the cake with the remaining cream.
- Start by filling the cake and spread some cream on the first layer cake, and add a few strawberries on top, then place the second cake layer carefully on top, then coat the entire cake with whipped cream. Smooth the top, then start decorating the cake in the shape of the Norwegian flag, starting with the blueberries, making a cross, then piping little ‘dots’ along the edges of the blueberries. Then decorate with the sliced strawberries to make four squares.
- And voila—you’ve got a May 17th cake!
Some key points to keep in mind before baking
- Don’t overwork the batter, barely fold it together to mix in the flour. Otherwise, the cake won’t get as light and delicate.
- Resist the temptation to open the oven to check on your cake before the 30 minutes are over. If you don't resist your cake might sink and collapse in the middle. If you have an oven light, turn it on so you can view it from the outside.
- If you have an oven thermometer this is great too, as most ovens vary in temperature. You want to make sure your oven is actually set at 350° Fahrenheit (180° Celcius).
- Make sure to completely cool, then chill the cakes in the fridge before decorating. Adding whipped cream to even slightly warm cakes… well—the cream will melt and you’ll have a mess on your hand.
- Do not use light canned coconut milk – full fat is a must, the higher the fat content the better (14 grams is good).
- Don’t rush the whipping of the aquafaba. For it to stay together and be workable whipping it for 9 to 10 minutes is a must. And yes, up to a cup of confectioners' sugar is right to add, in order to make it taste sweet and to thicken up and hold the shape of whipped cream. Choose low-sodium cans of chickpeas as we don’t want salty whipped cream 🙂
- Now you're ready—happy baking and please tag me on IG @arcticgrub if you decide to bake the cake!


0 Comments